


Export to glTF with Cinema 4D
Understanding the basics of glTF (graphic language transmission format) is important for the production of interactive 3D content for the web and XR (Extended Reality). This post will focus on the glTF2.0 export plugin (i1) that’s integrated in Maxon C4D (Cinema 4D)
The glTF standard is a streamlined, interoperable 3D format developed by The Khronos Group. The minimized file size and runtime processing makes this “jpeg for 3D” the ideal solution for asset creation. Many well known brands, applications and platforms are using this technology for web, platform, applications and plugins. Such as: Sketchfab, Vectary, Babylon, Tree.js, PubliXR, Android, Adobe Substance Painter, Gestaltor, Maya, Blender, Unreal, etc. The engine supports the most common 3D properties. The first question is which of those are compiled in the software you're working with (in this case Cinema 4D). The second question is how to use them properly.

The glTF export properties
Scene
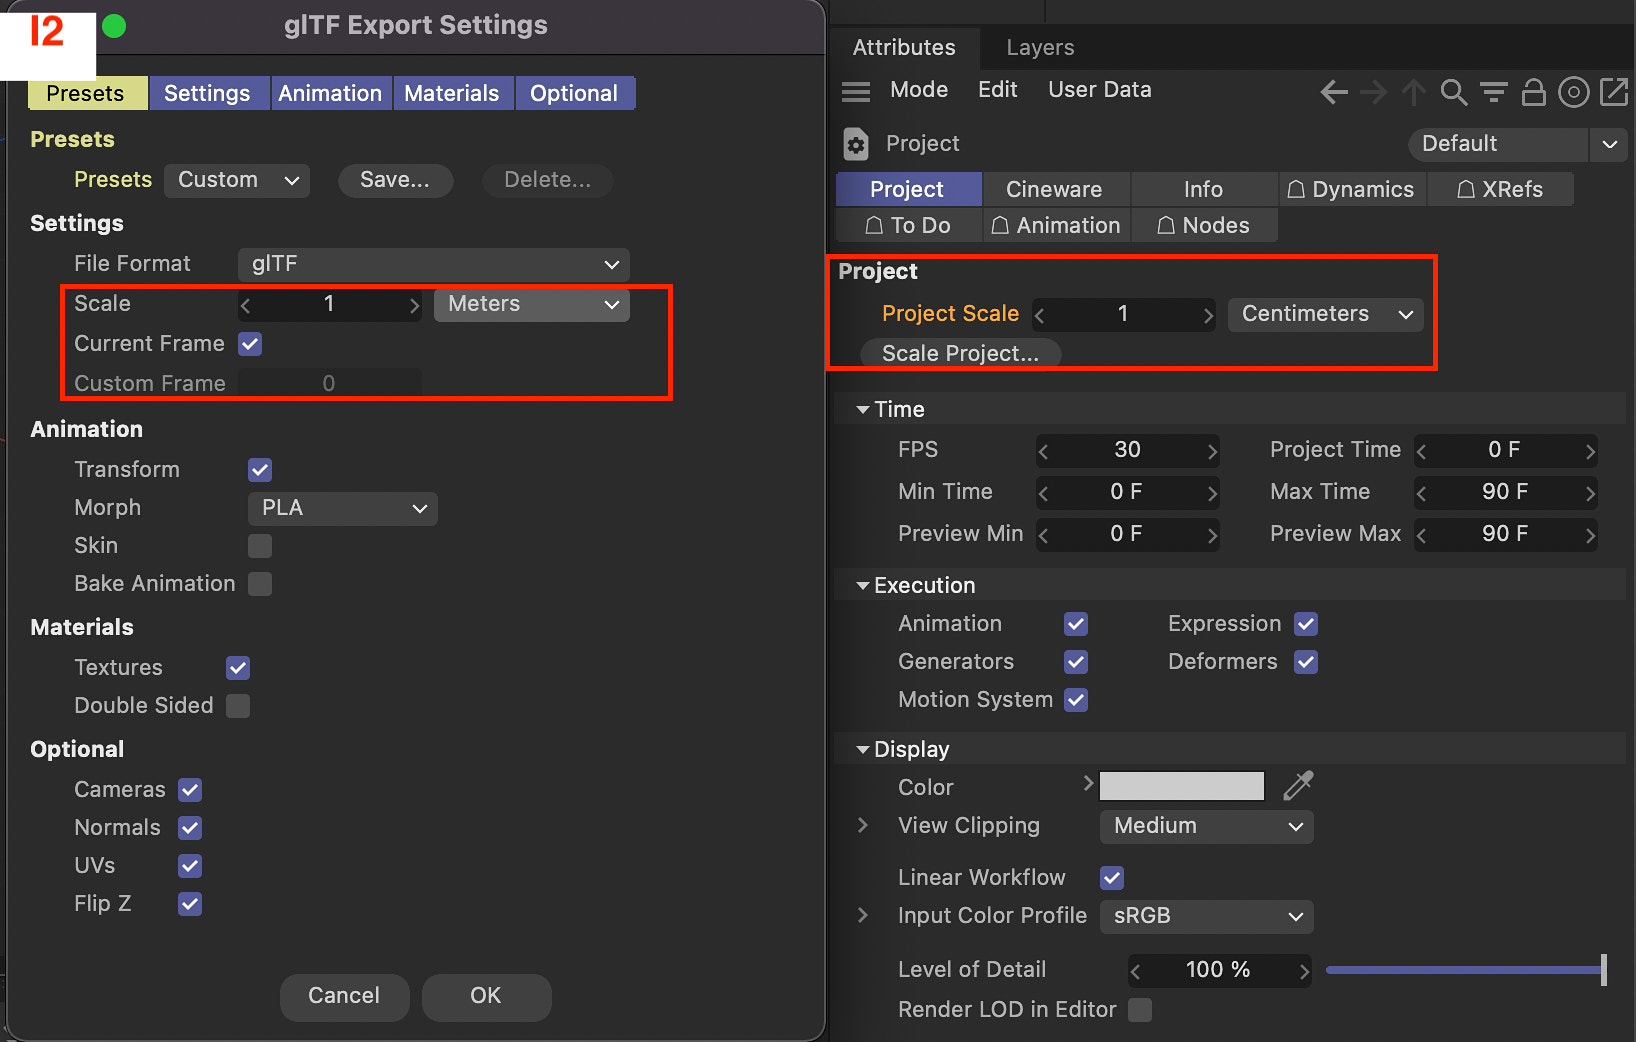
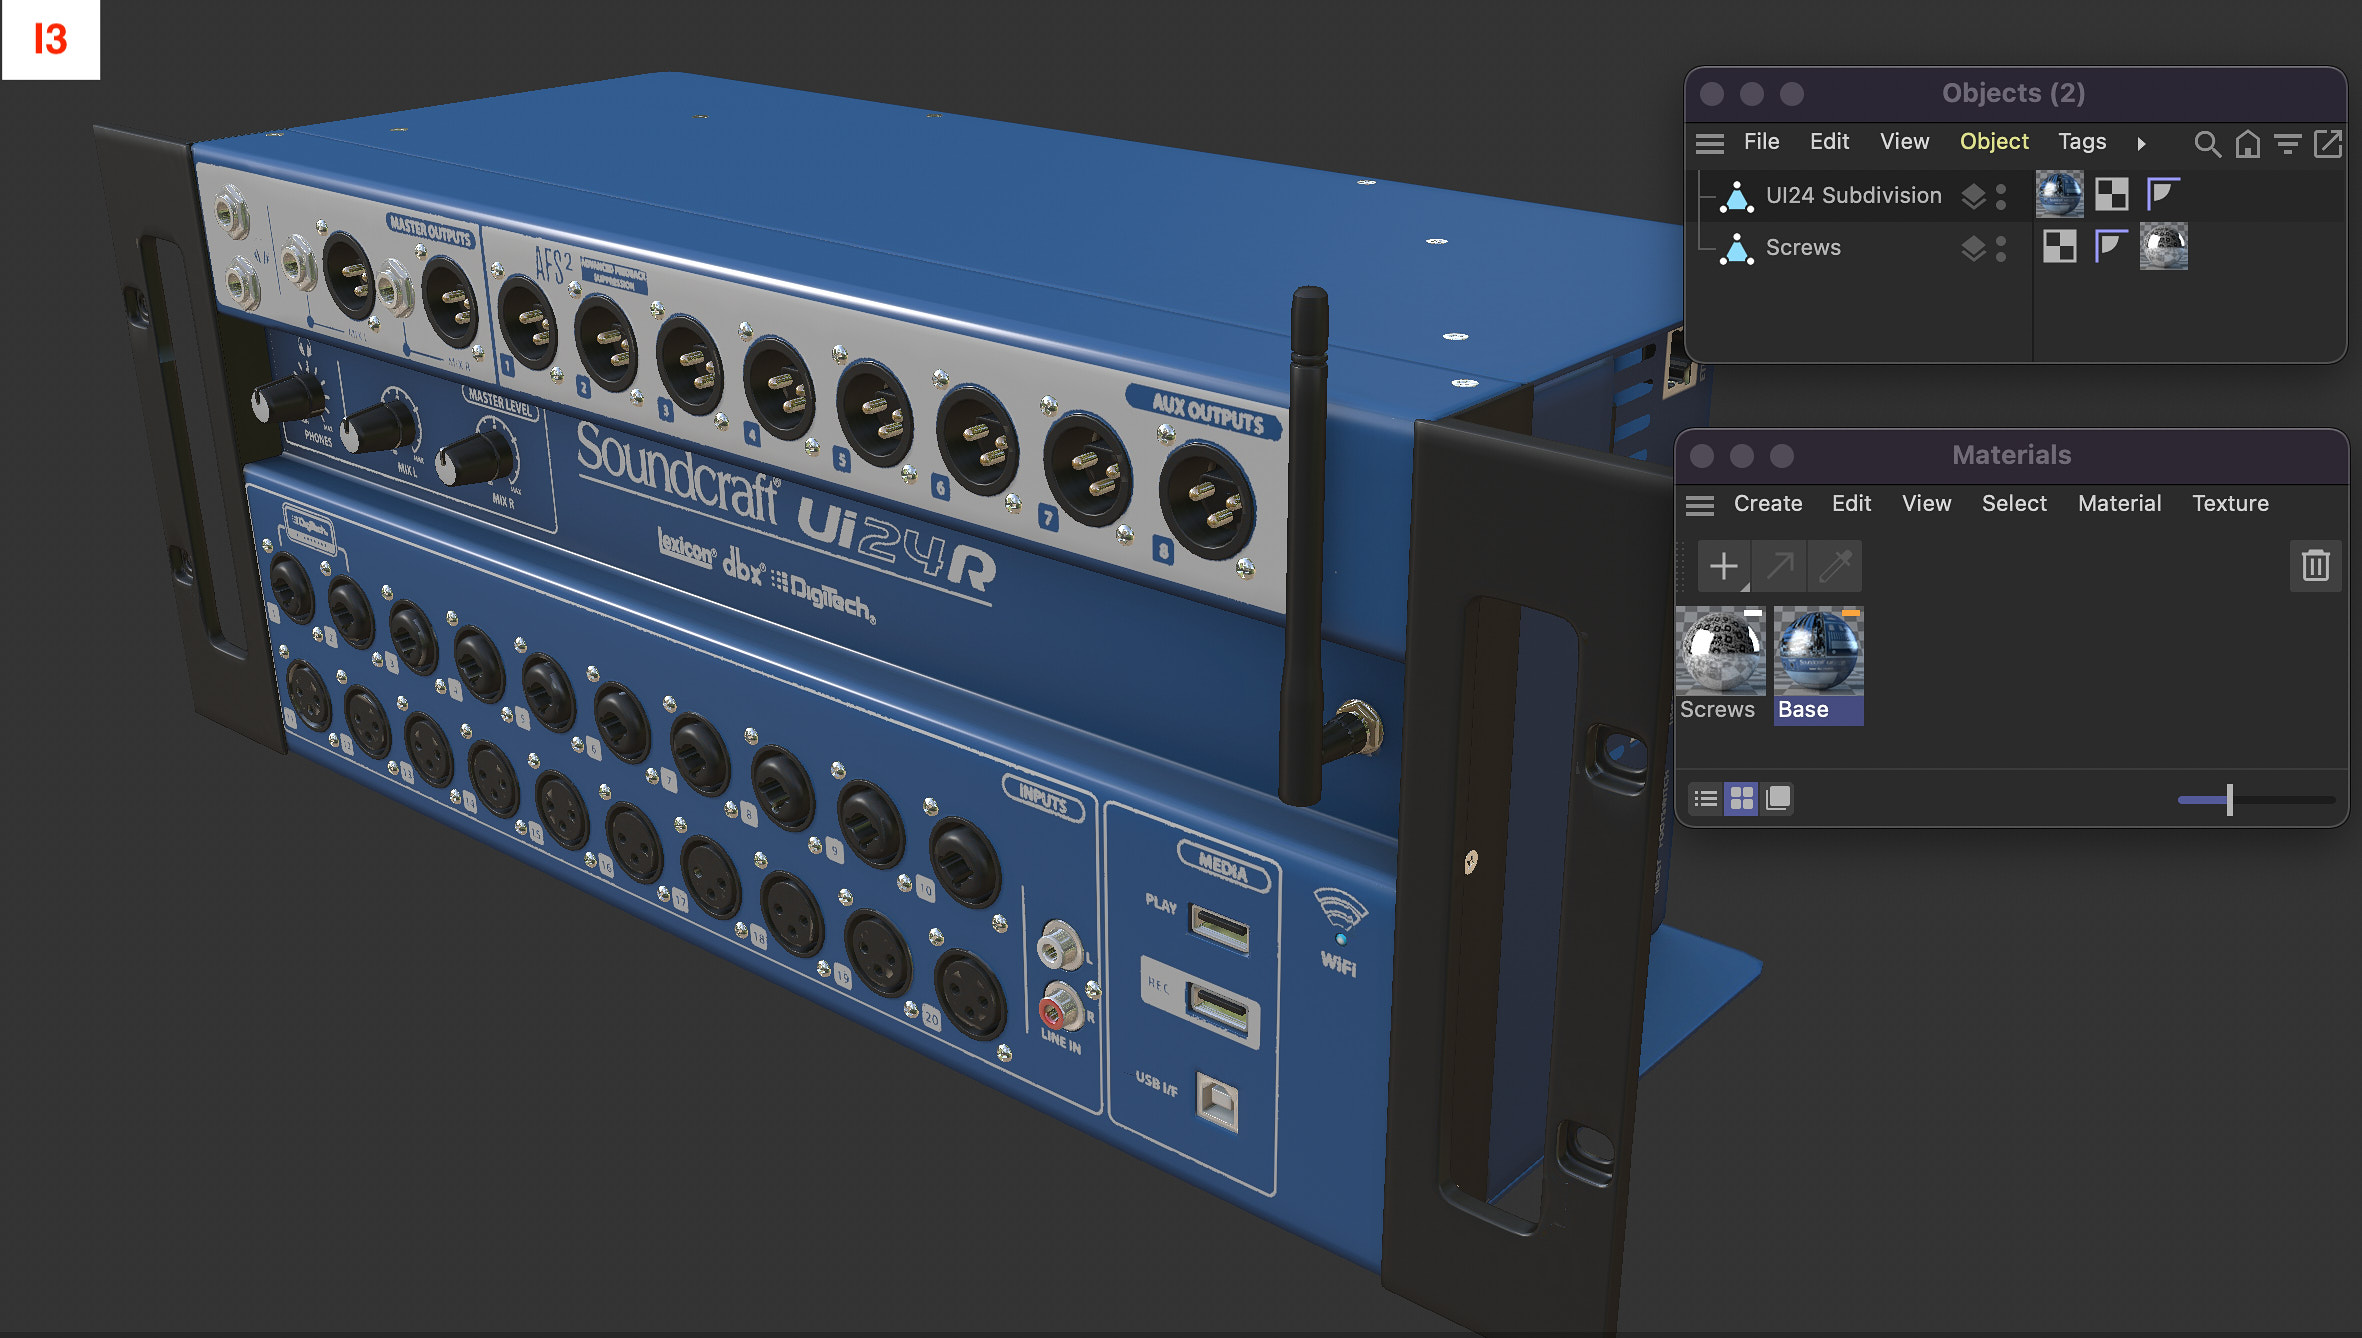
When exporting a scene to glTF it’s important to work in the appropriate project scale (i2) and optimise all elements (objects). Avoid exporting elements that aren't supported and remove them from the scene (i3). Note that C4D won’t give any error reports when exporting not supported elements. Therefore exports can result in unexpected behaviors, bigger file size, errors and performance issues in the renderer where the glTF has to operate.
Cameras
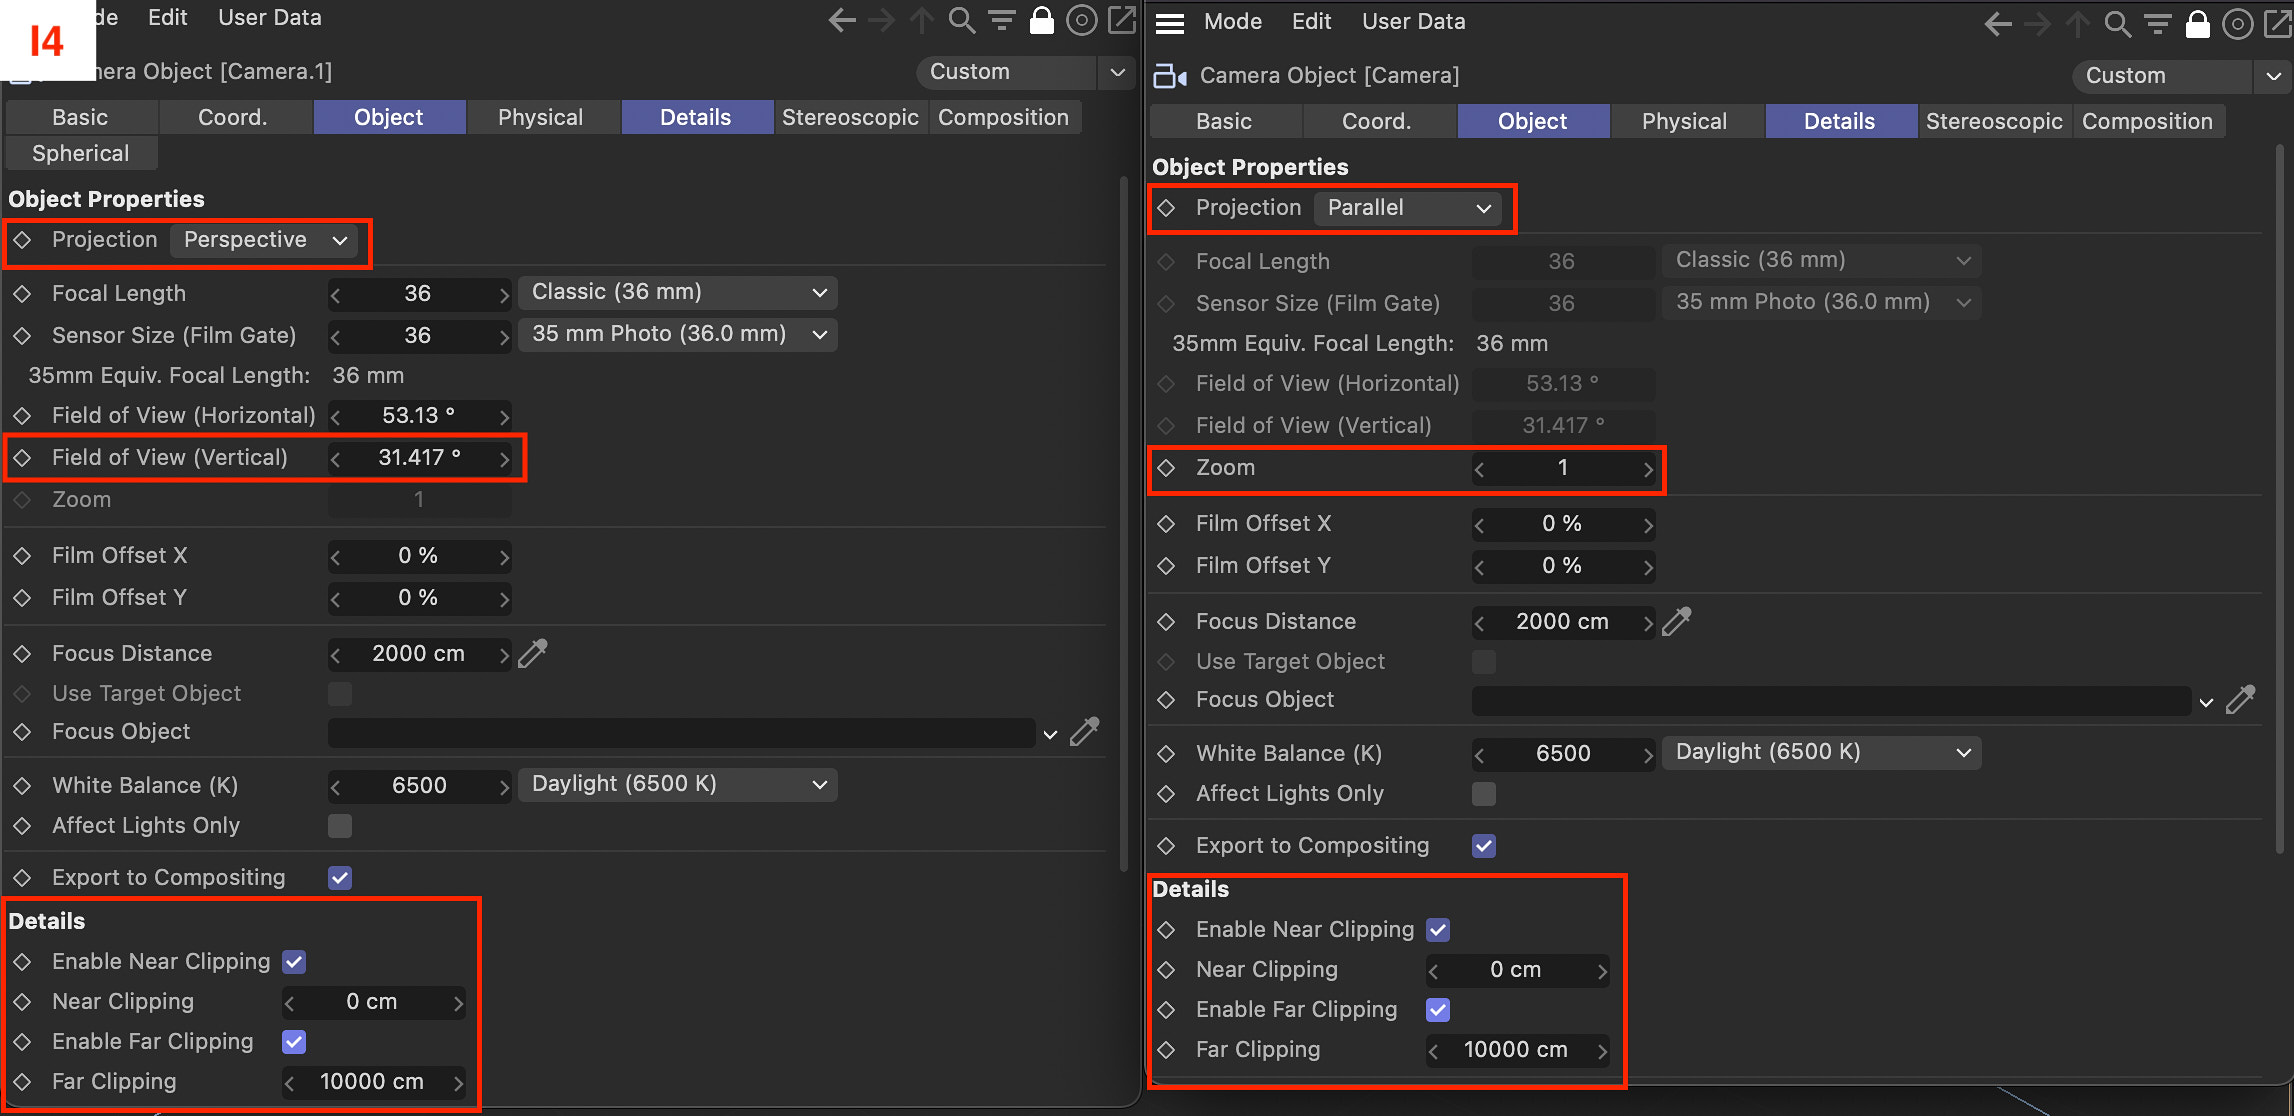
Multiple cameras can be exported with an “perspective” or “orthographic” projection. The camera parameters are limited to “field of view” (zoom for orthographic projection) and “near/far clipping”(i4). Consider this functionality as an option when the glTF file has to function on it’s own. However in bigger setups it’s more common to work with a camera that’s been generated (or loaded somewhere else) within the real time renderer.
Meshes
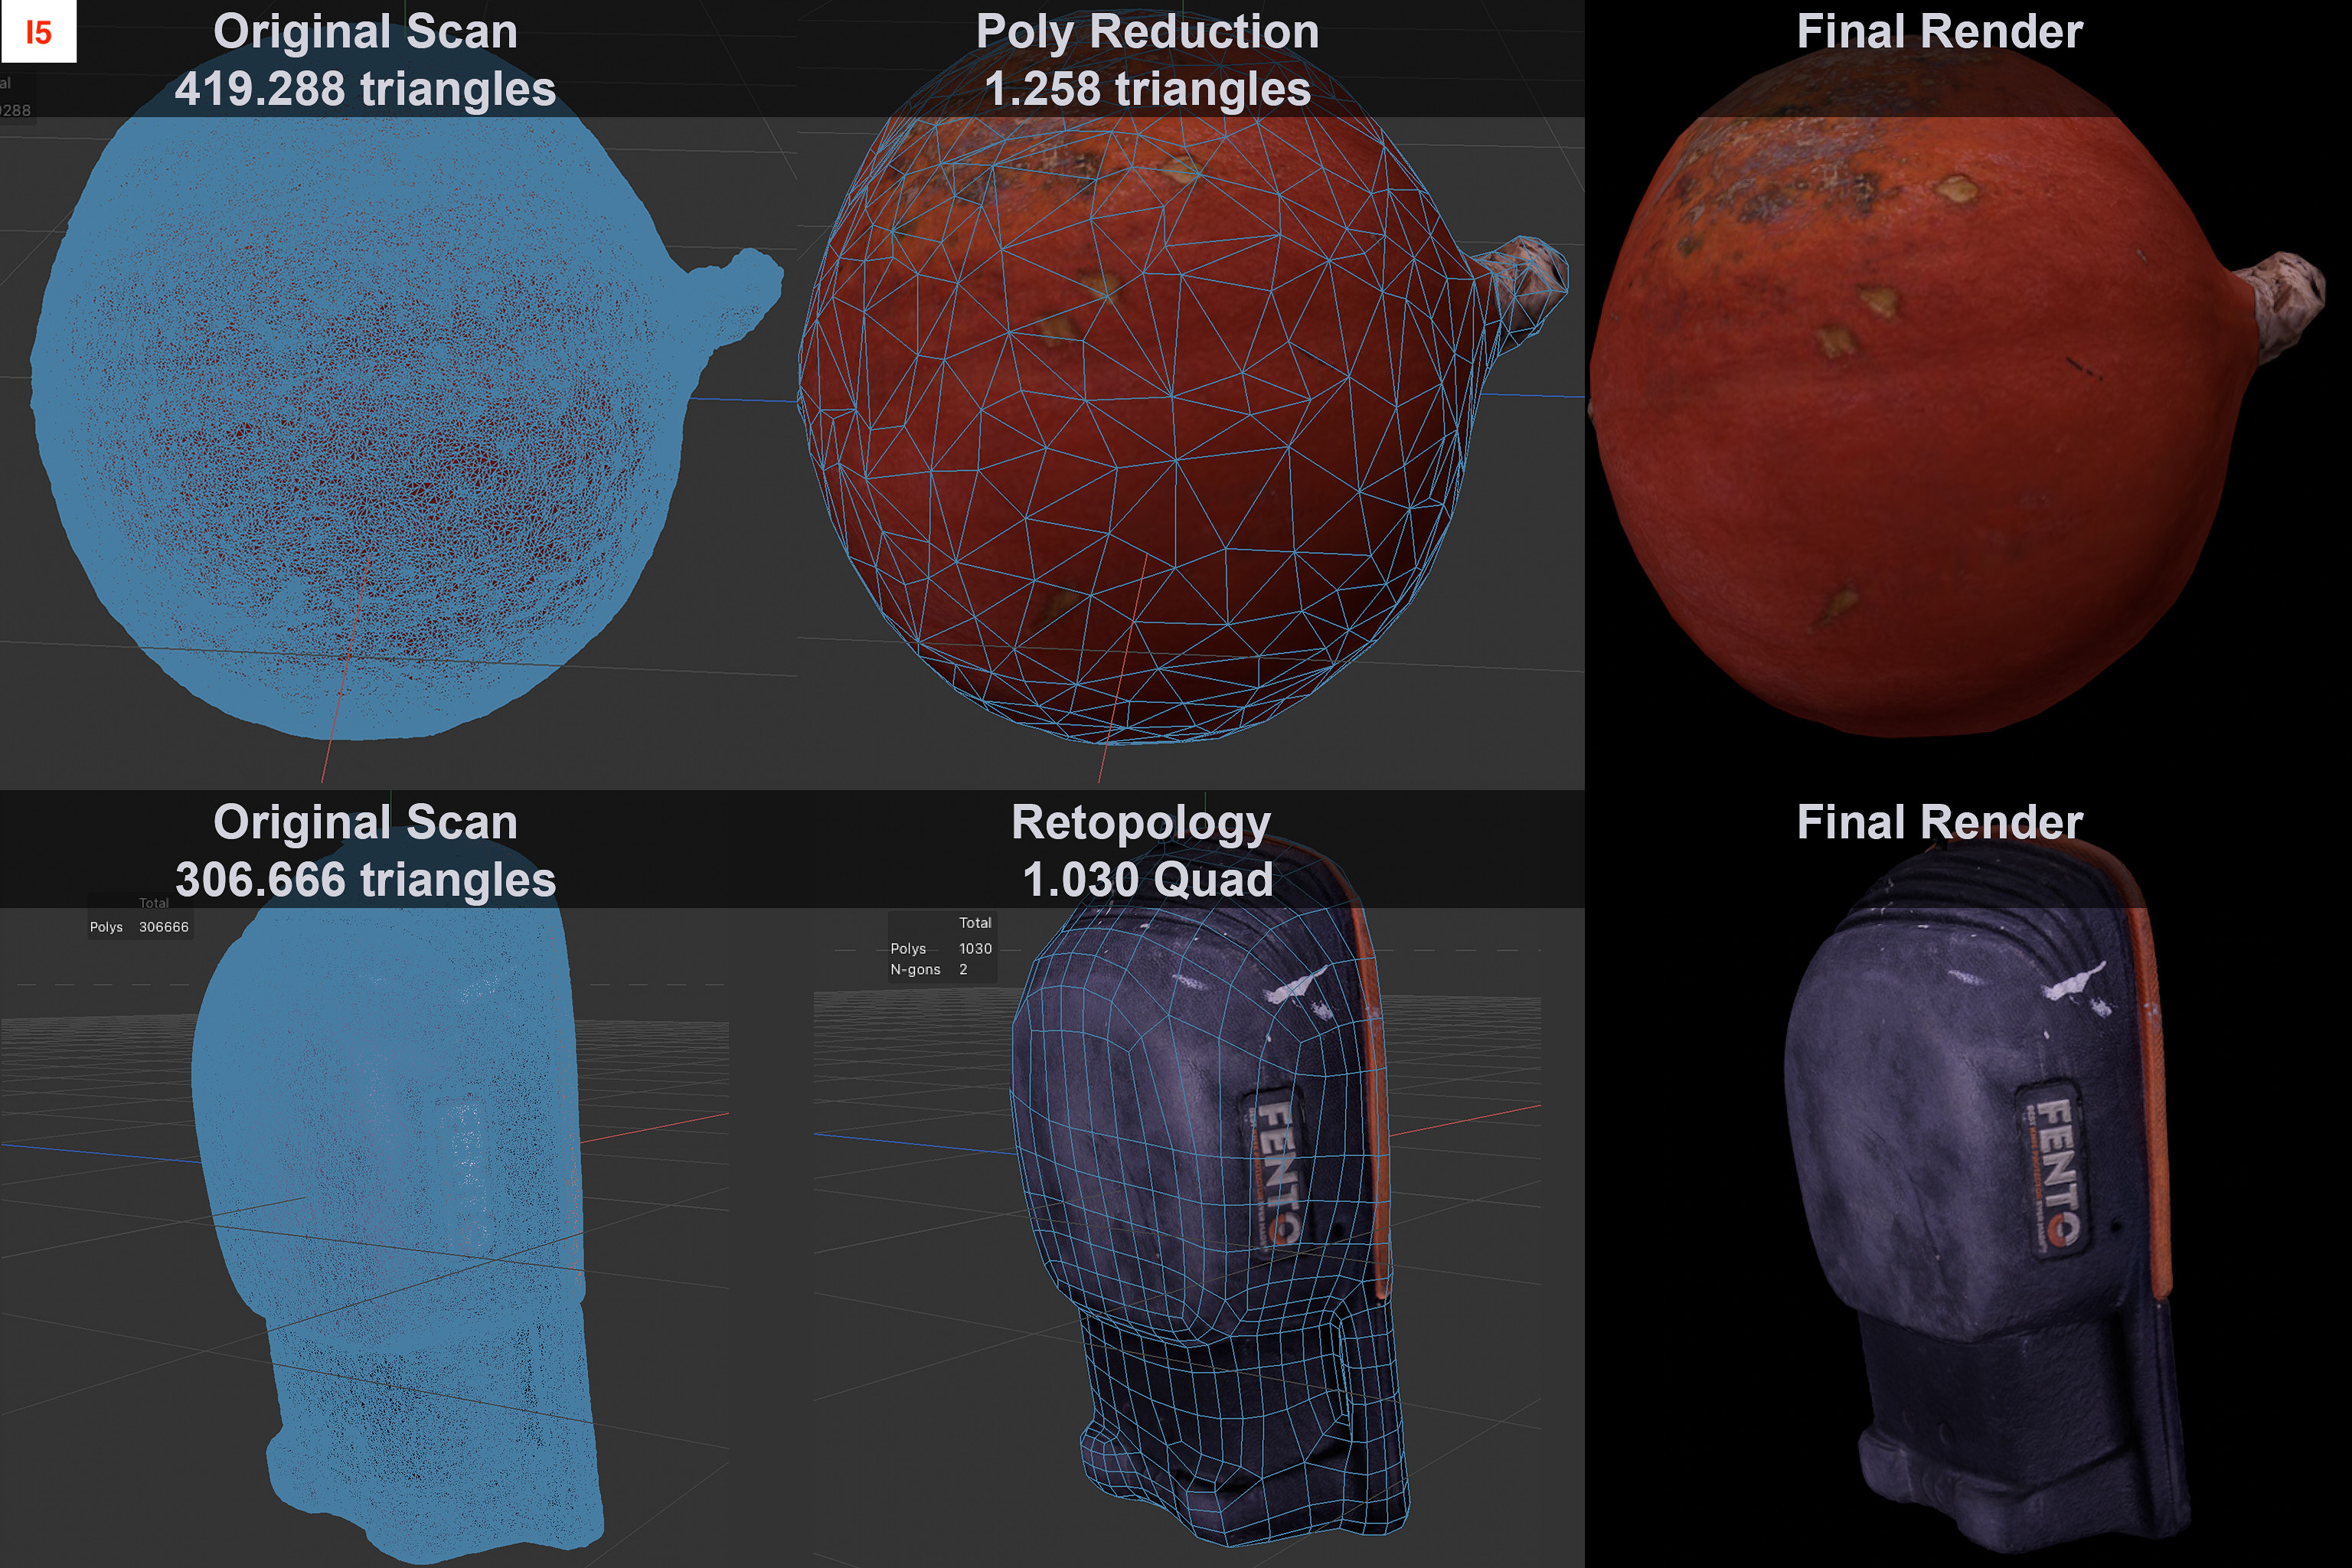
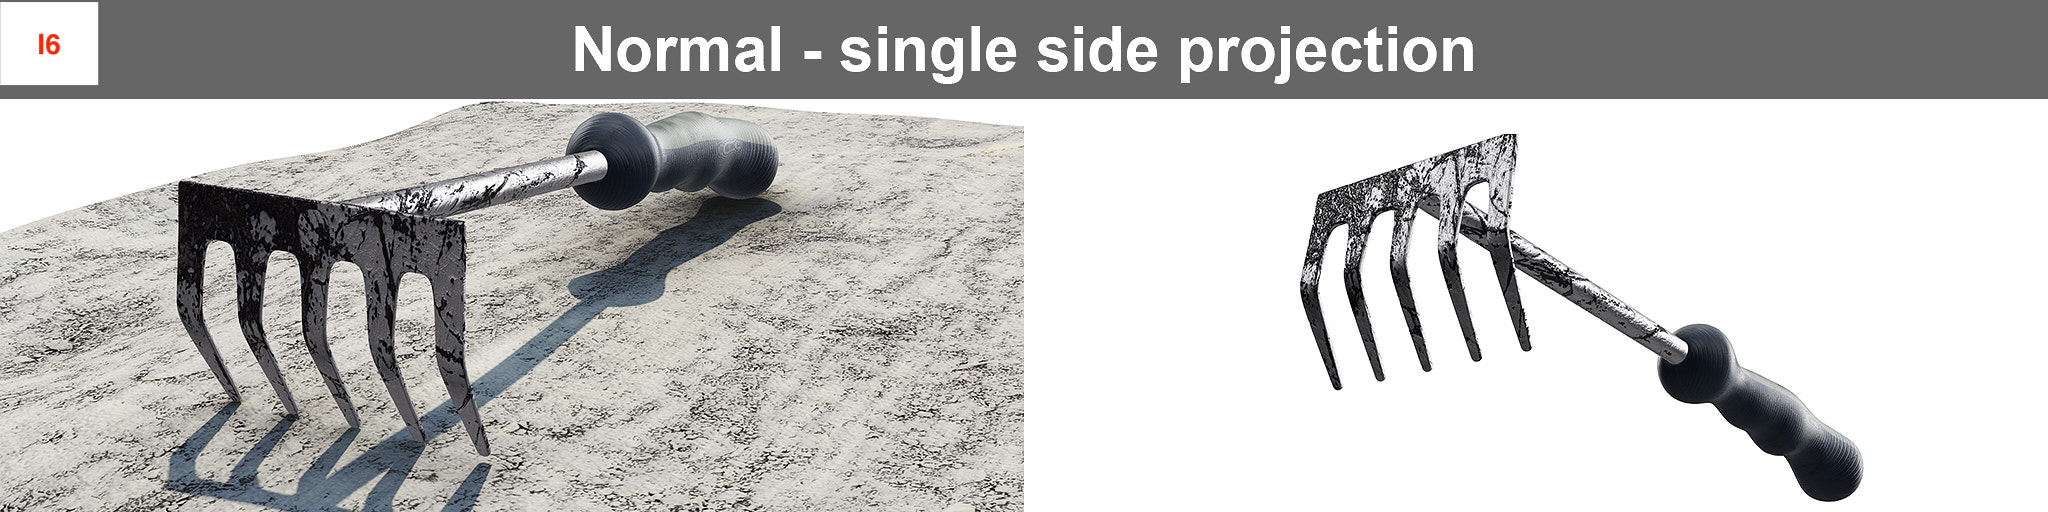
All meshes should be optimised polygon objects with a (single) uv-map. Keep the quad and triangle count low to minimize the file size and achieve higher performance from the engine. Consider poly-reduction or retopology techniques when working with high detailed models or 3D scans (i5). glTF mesh-primitives are based on triangles, therefore quads will be automatically triangelated on export. Normals should be properly aligned and can be used for visibility purposes or double sided material projection (i6).
The material model and textures
glTF materials are based on physical properties and therefore PBR (Physically Based Rendering) techniques are possible. The metallic roughness model is the glTF default model(i7). The specular glossiness model is available as an extension for glTF. The C4D plugin is based on the default properties of glTF. Errors can be expected when exporting materials with the specular glossiness model from C4D. Consider using alternative software for texturing (such as Adobe Substance Painter or Gestaltor) if the specular glossiness model or not supported material channels are required in your end product.
Materials, channels and inputs
The C4D viewport (i8) and Physical renderer are PBR based, but with a different structure in the materials than the general metallic roughness workflow in other plugins and software. The standard material (i9)should be used to export a glTF from C4D. Errors or unpredictable behaviours are expected when exporting with other materials such as the Node, U-Render or Redshift materials.
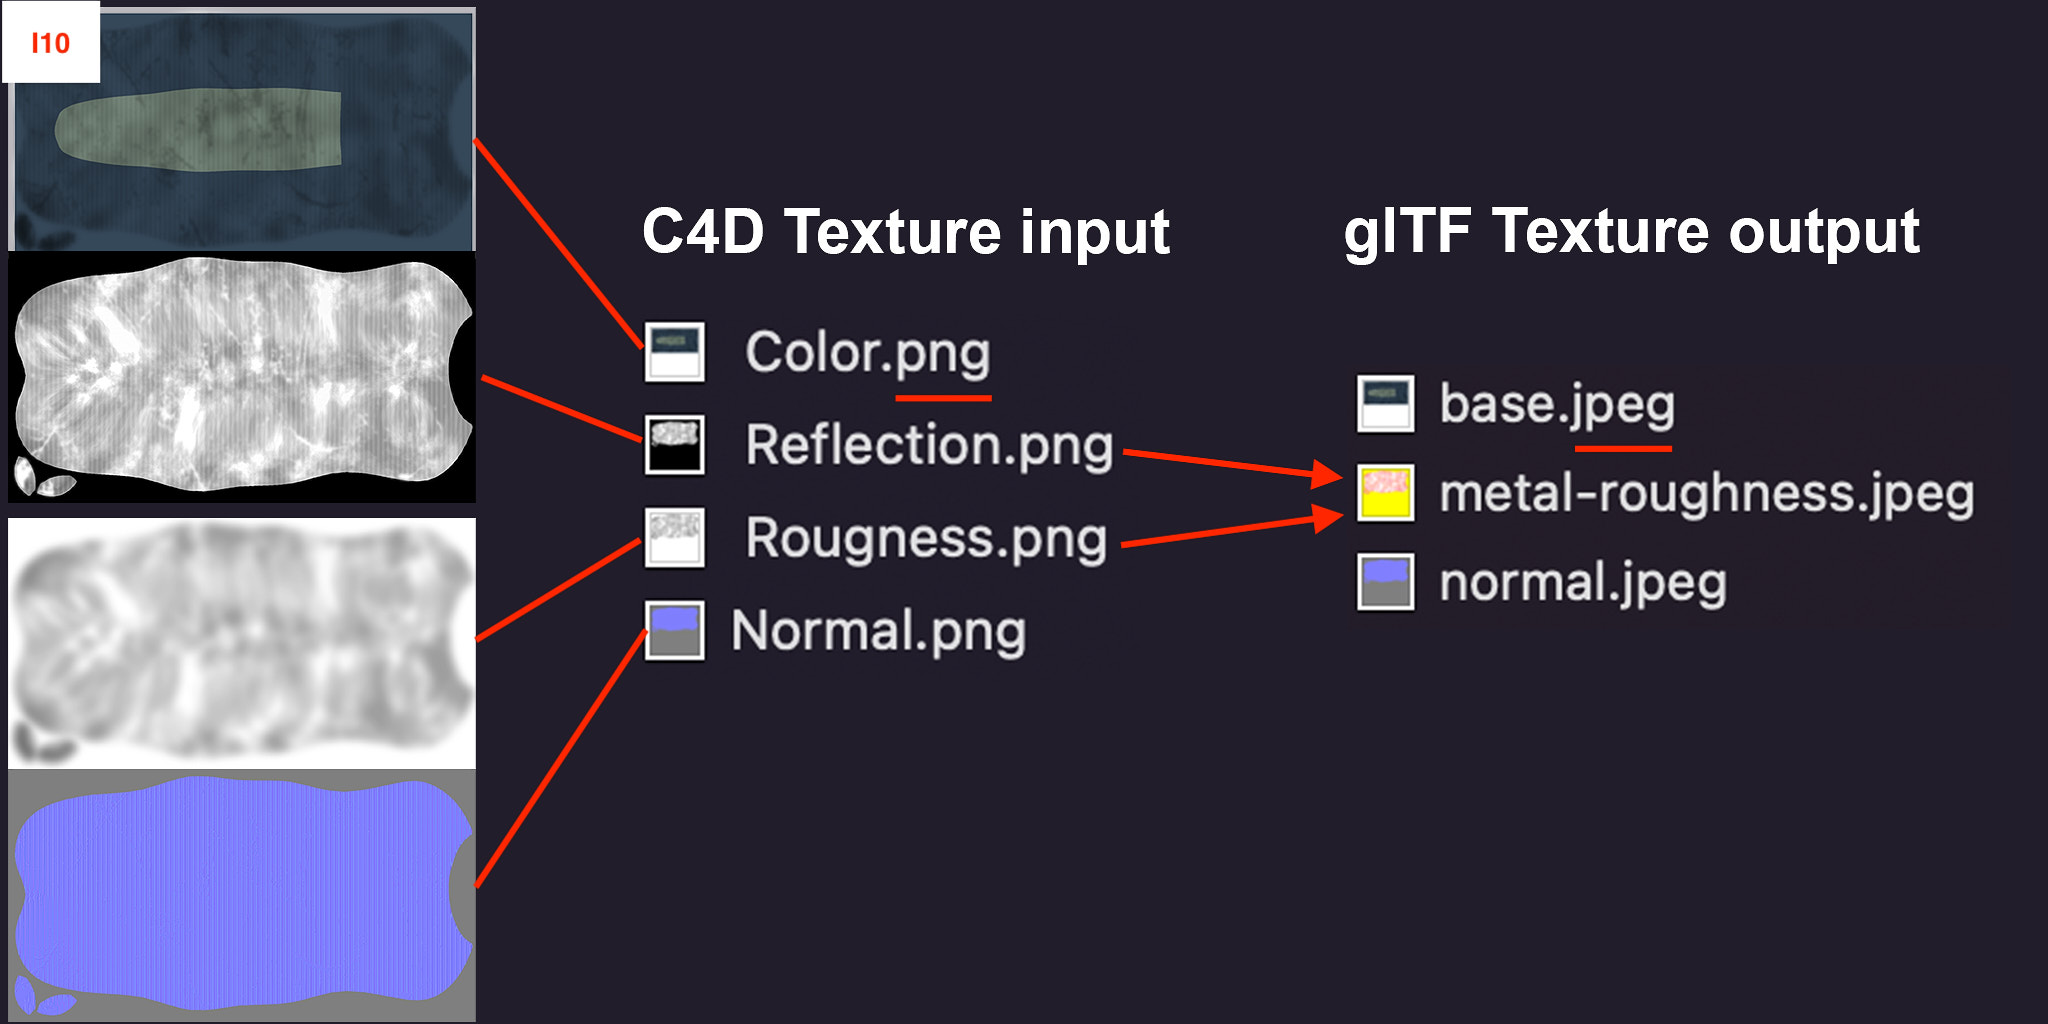
The input of a supported material channel should be a parameter value, color and/or a relatively measured square bitmap texture in .jpg, .png or .tiff. Working with 4k resolution textures or smaller is advised especially for mobile devices. When exporting to glTF all textures will automatically be converted into .jpg (i10) and the metallic and roughness textures will be combined into a single texture.
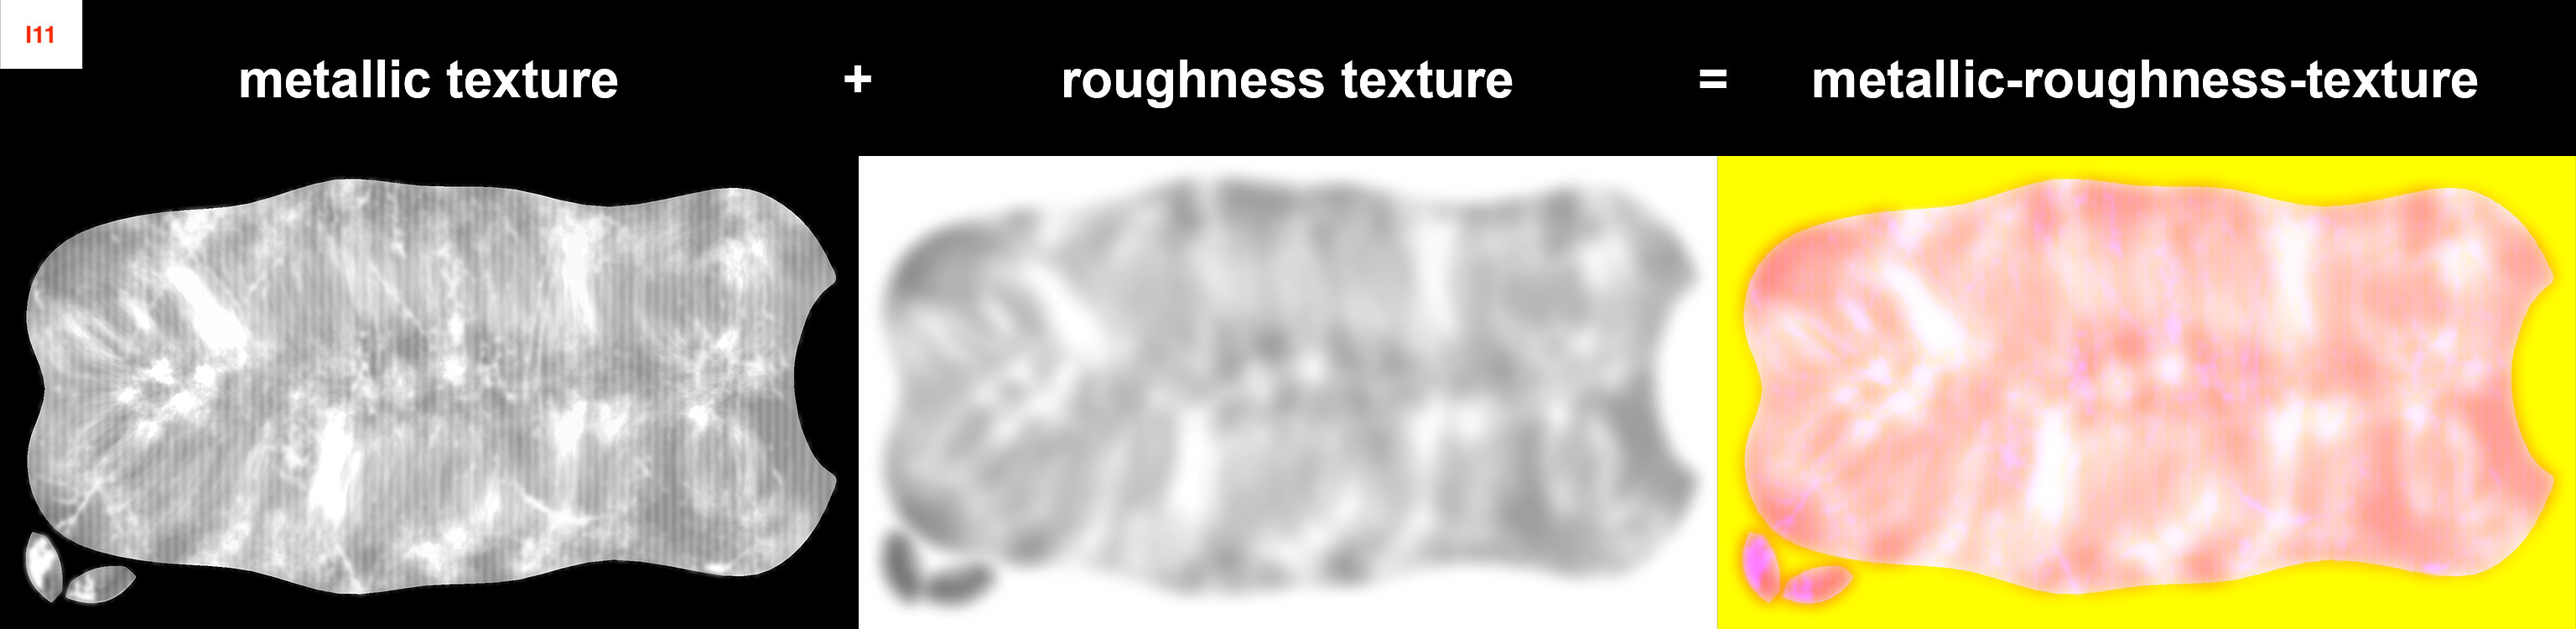
Note 1: Metallness in the “blue” channel and roughness in the “green” channel. (i11)
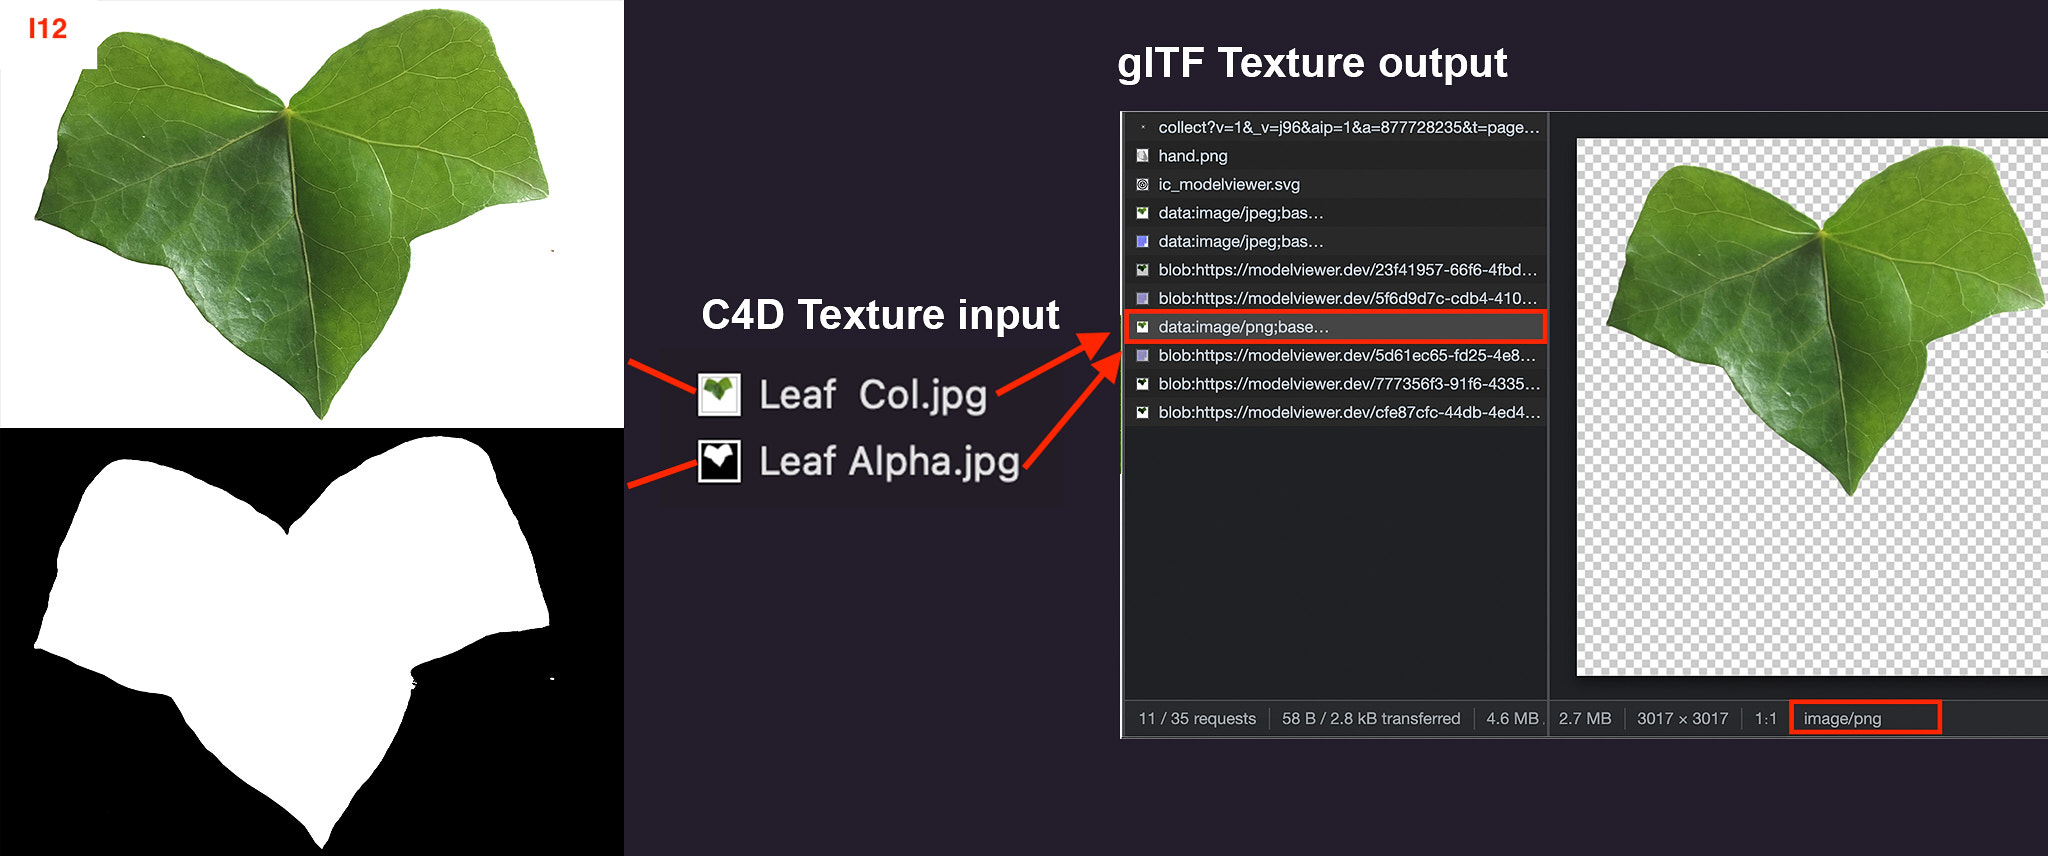
Note 2: The Color+Alpha will be combined in a single .png file when using both channels. (i12)
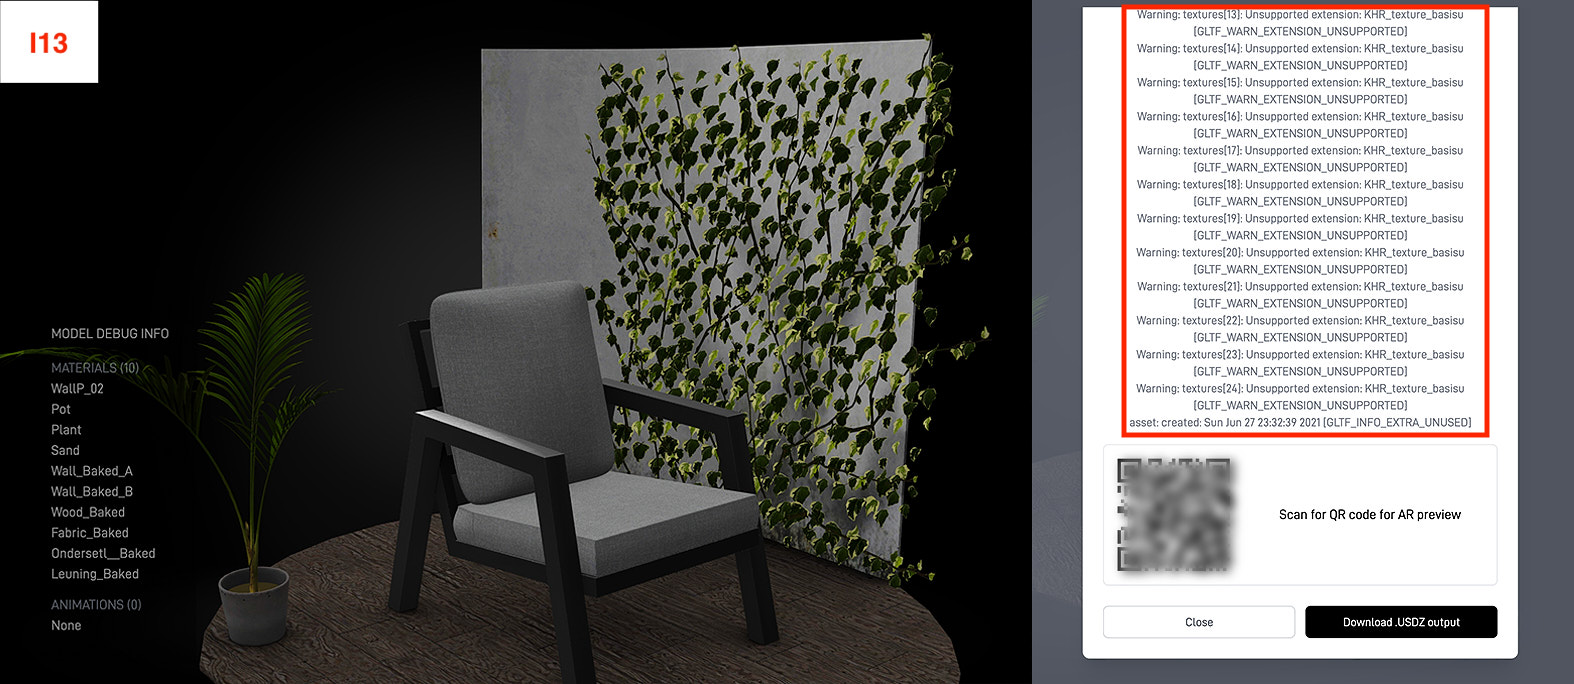
glTF can offer a lot of possibilities and extensions for textures after exporting from C4D. From swapping textures, KTX (GPU optimised image compression) to GLSL shaders. Careful consideration is advised by productions that have to operate in various applications simultaneously. The extensions for glTF aren’t designed to support Pixar USD(Z) which is the fundament for XR with Apple devices. (i13)
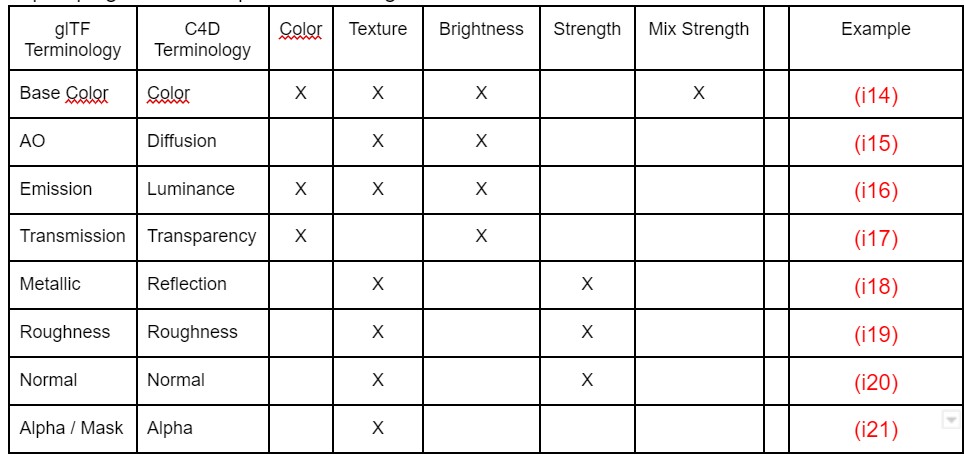
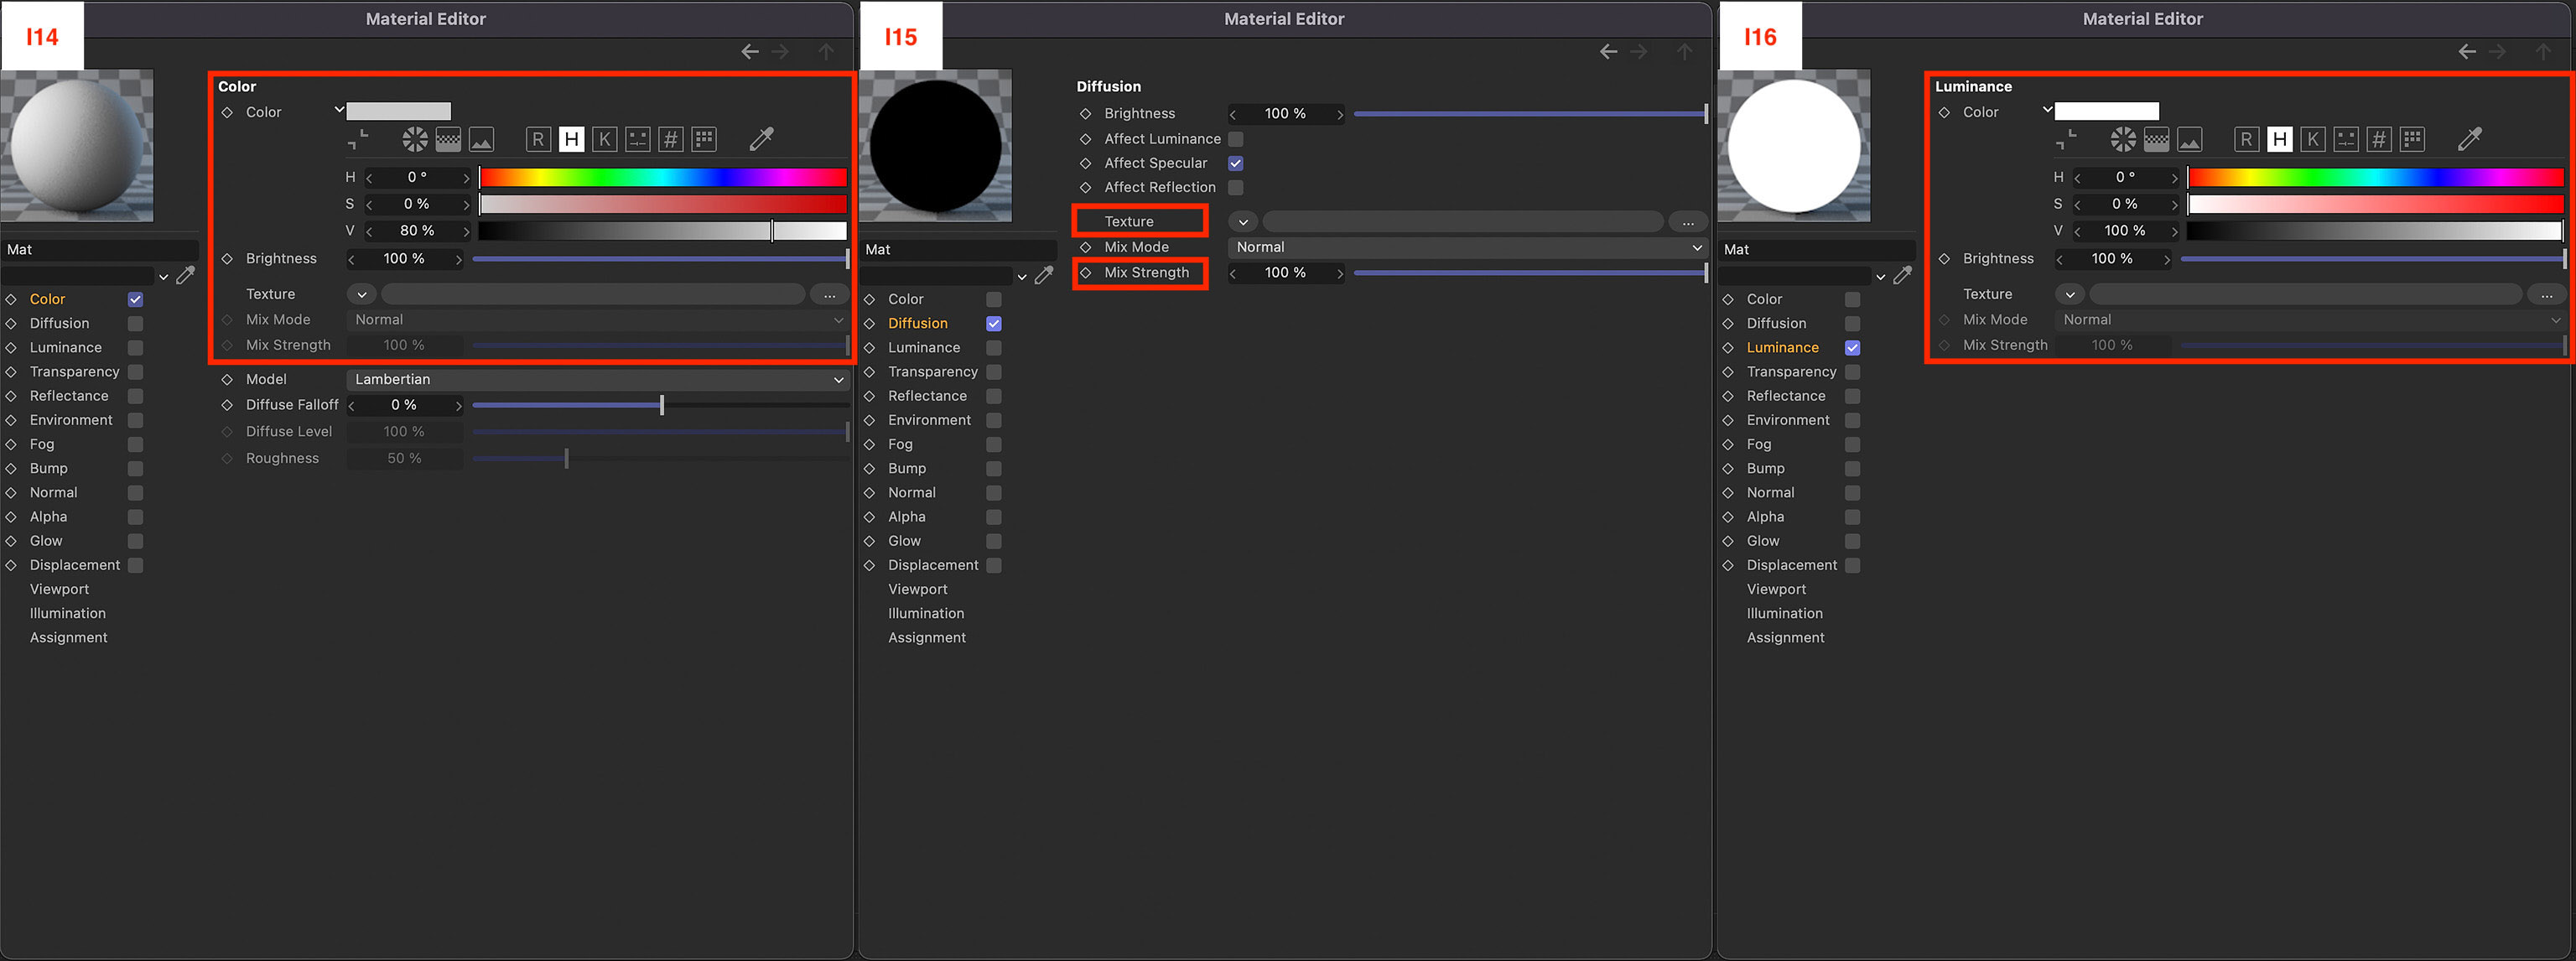
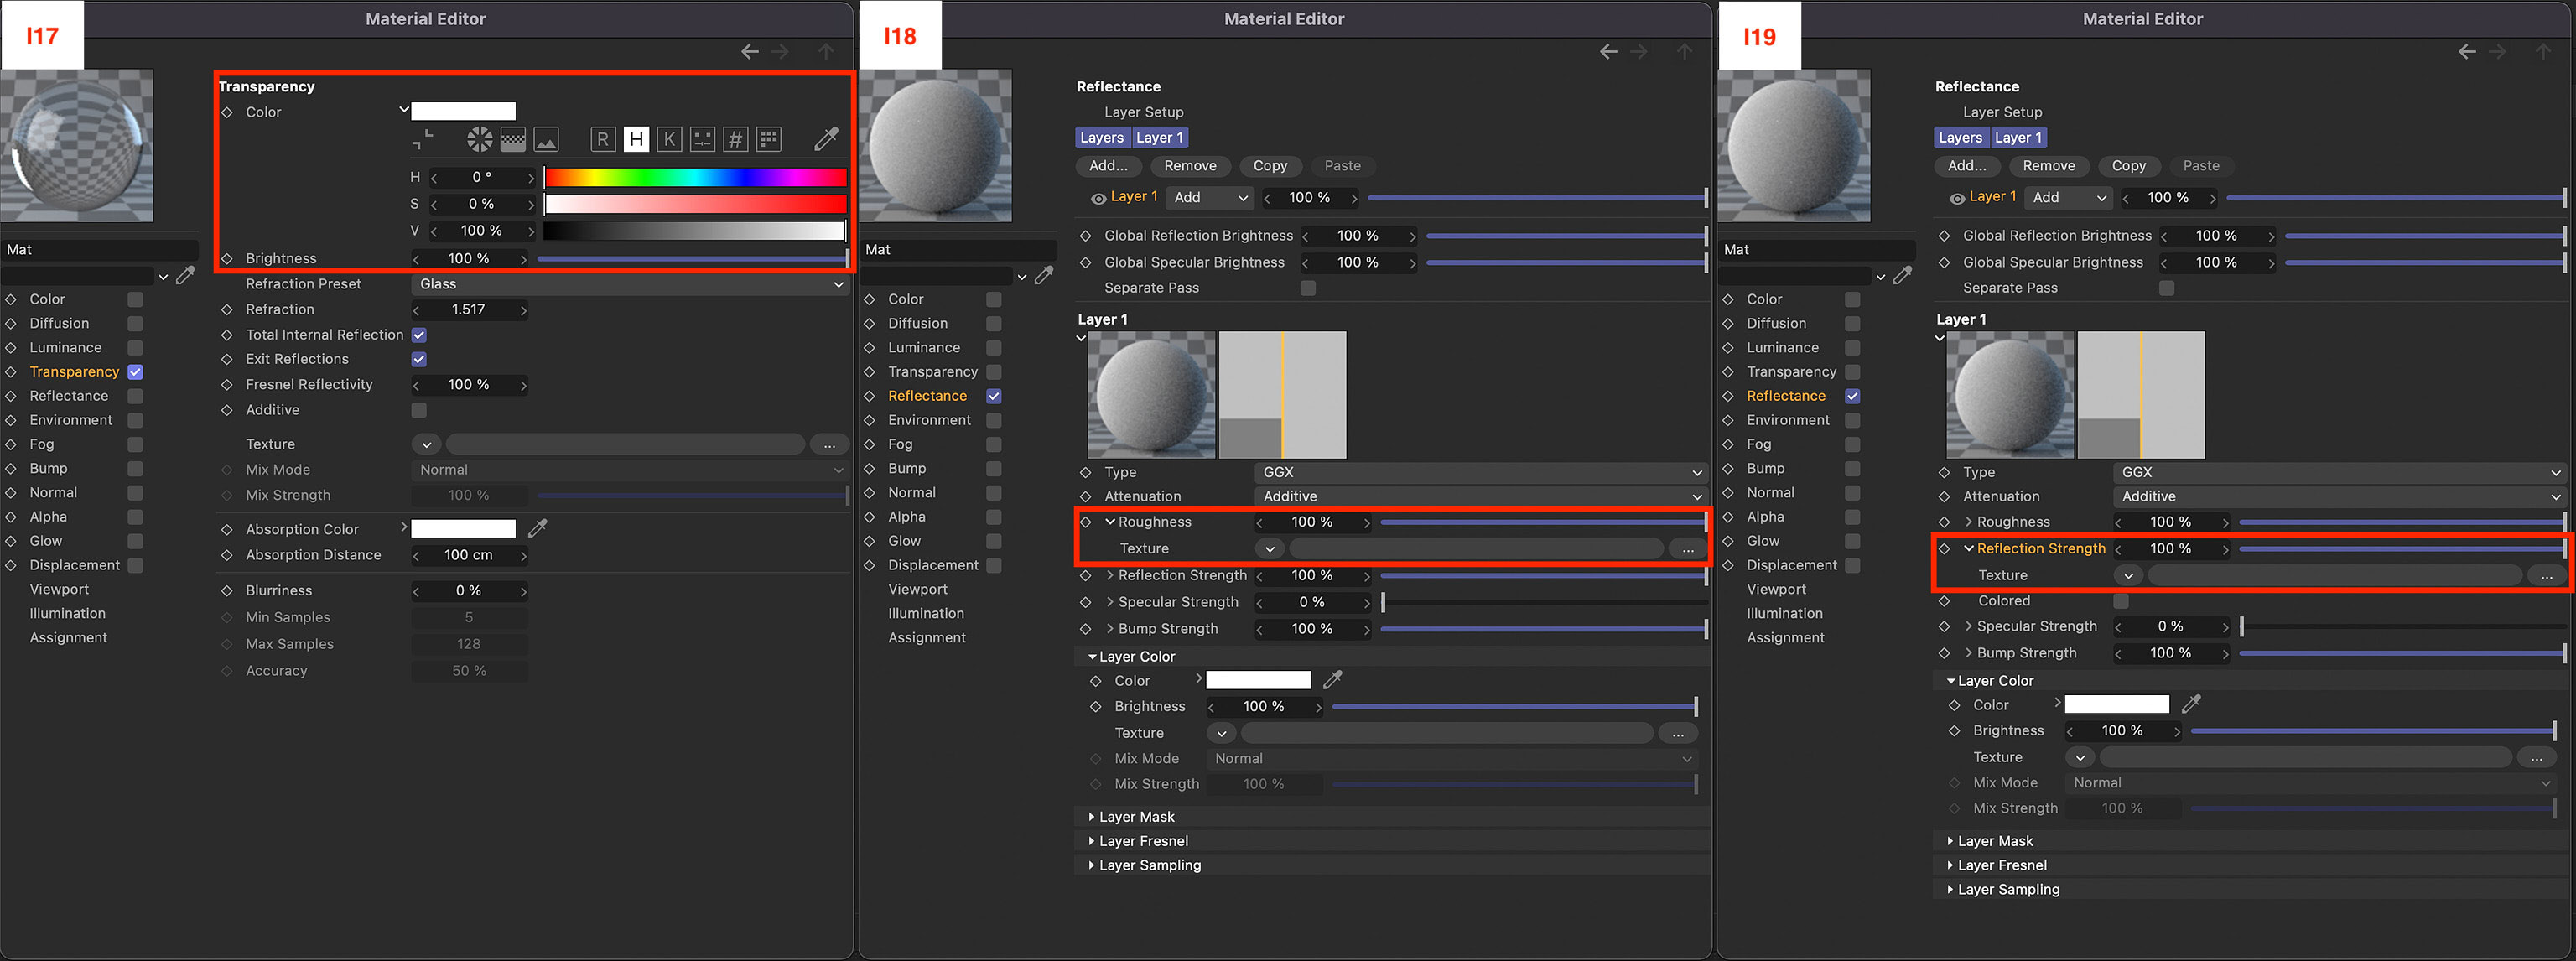
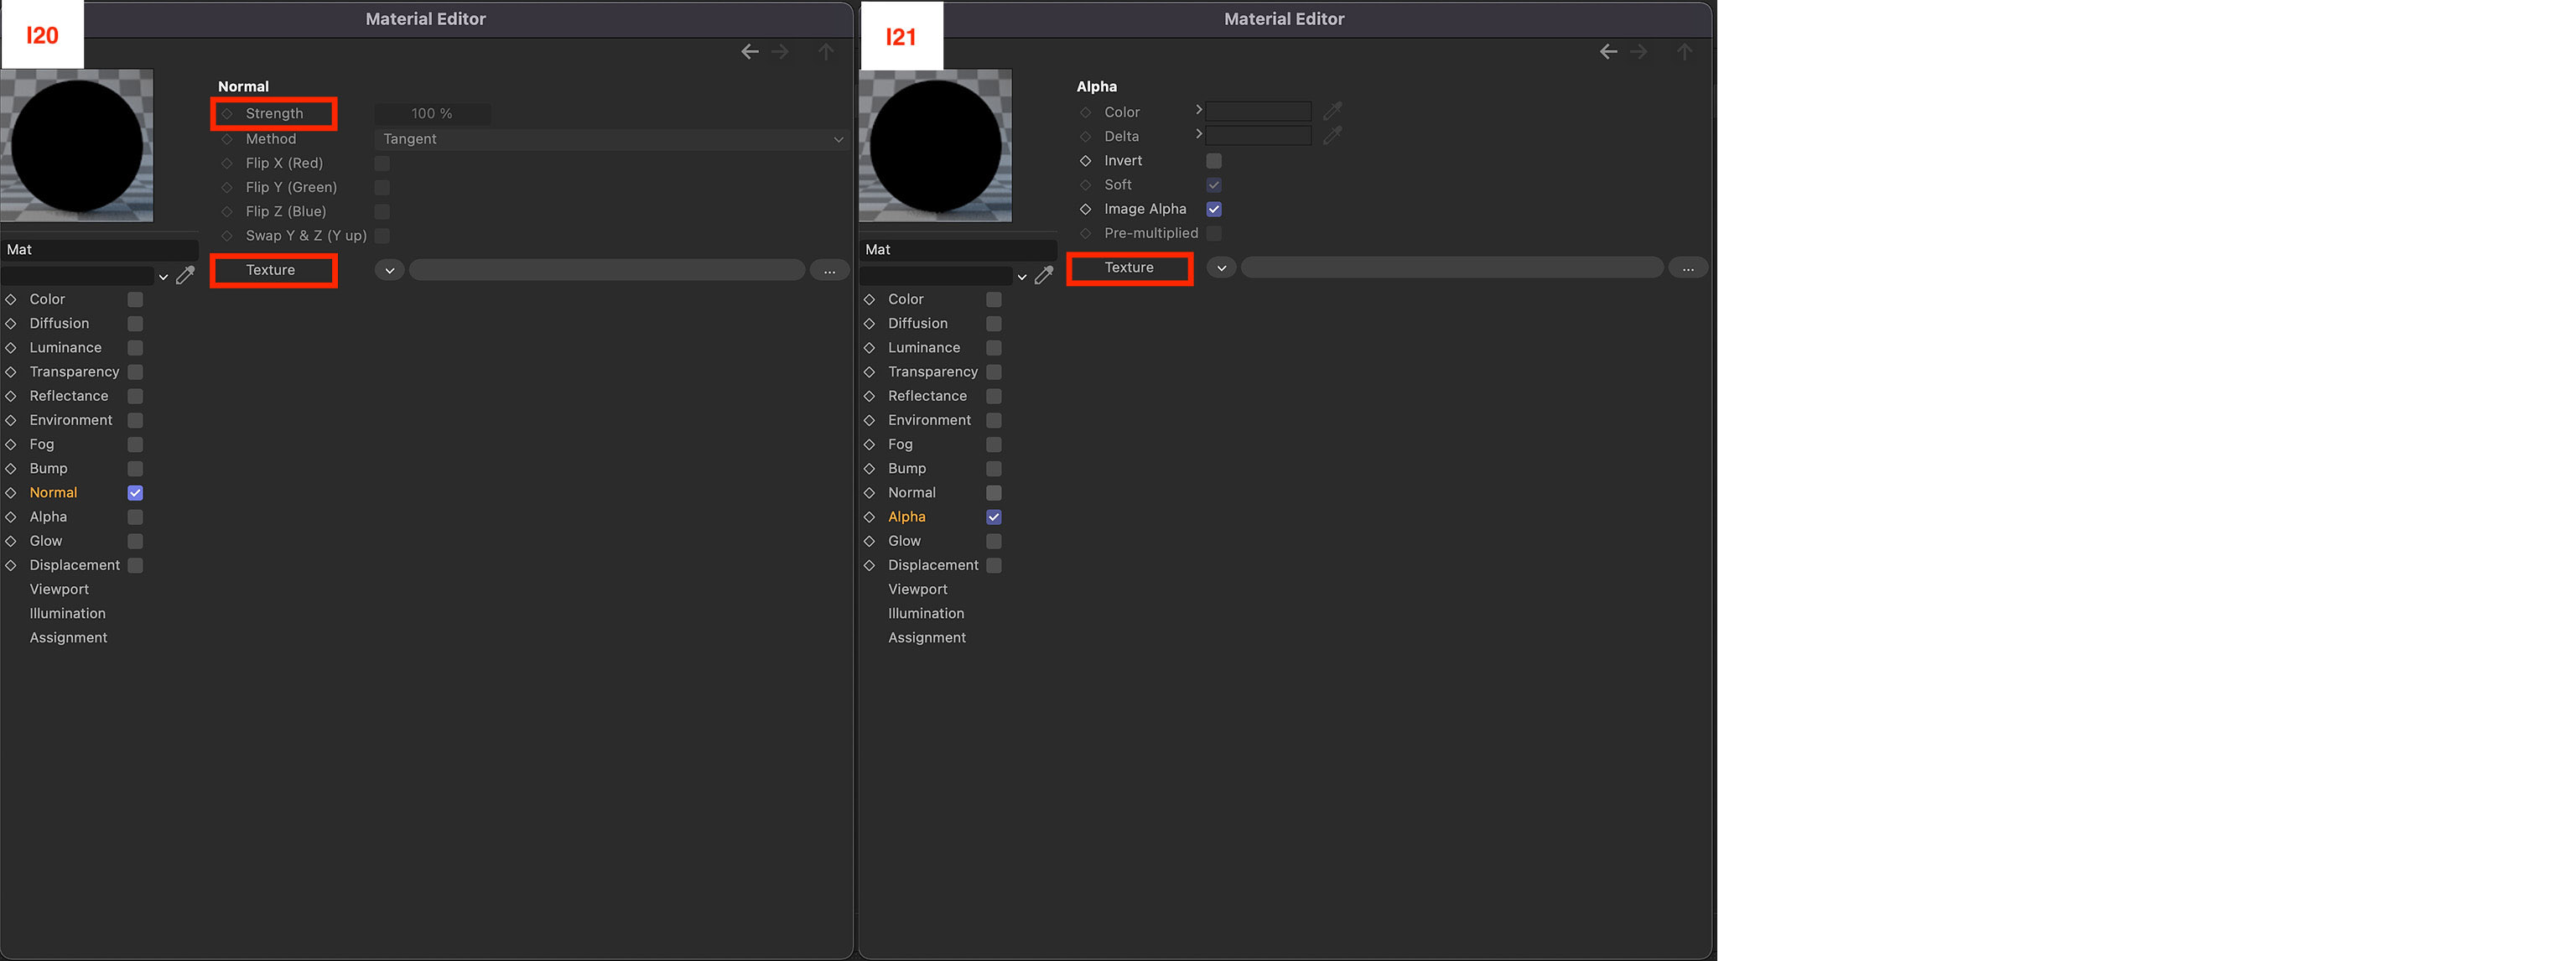
The table below shows the properties that define a metallic roughness material for the glTF export plugin in C4D. Tip: view the images for locations in the standard material in C4D R25
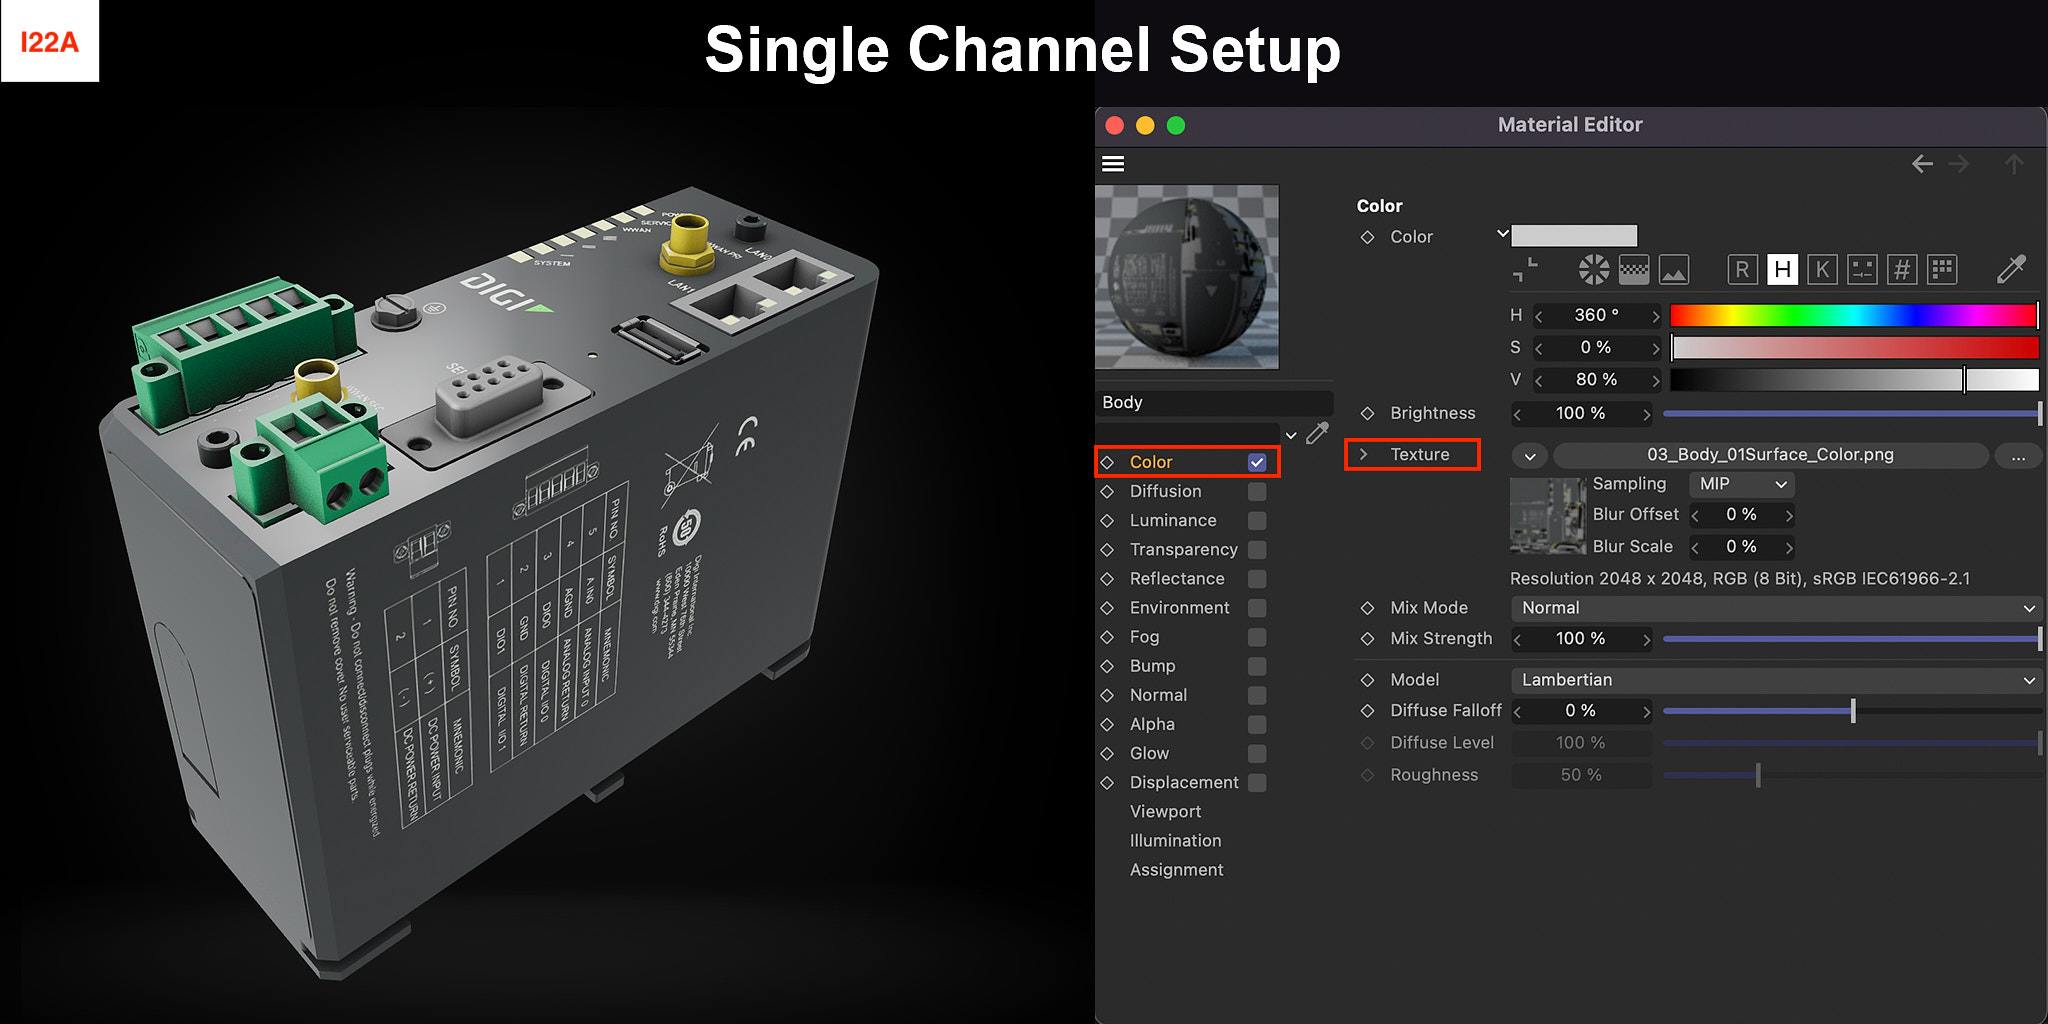
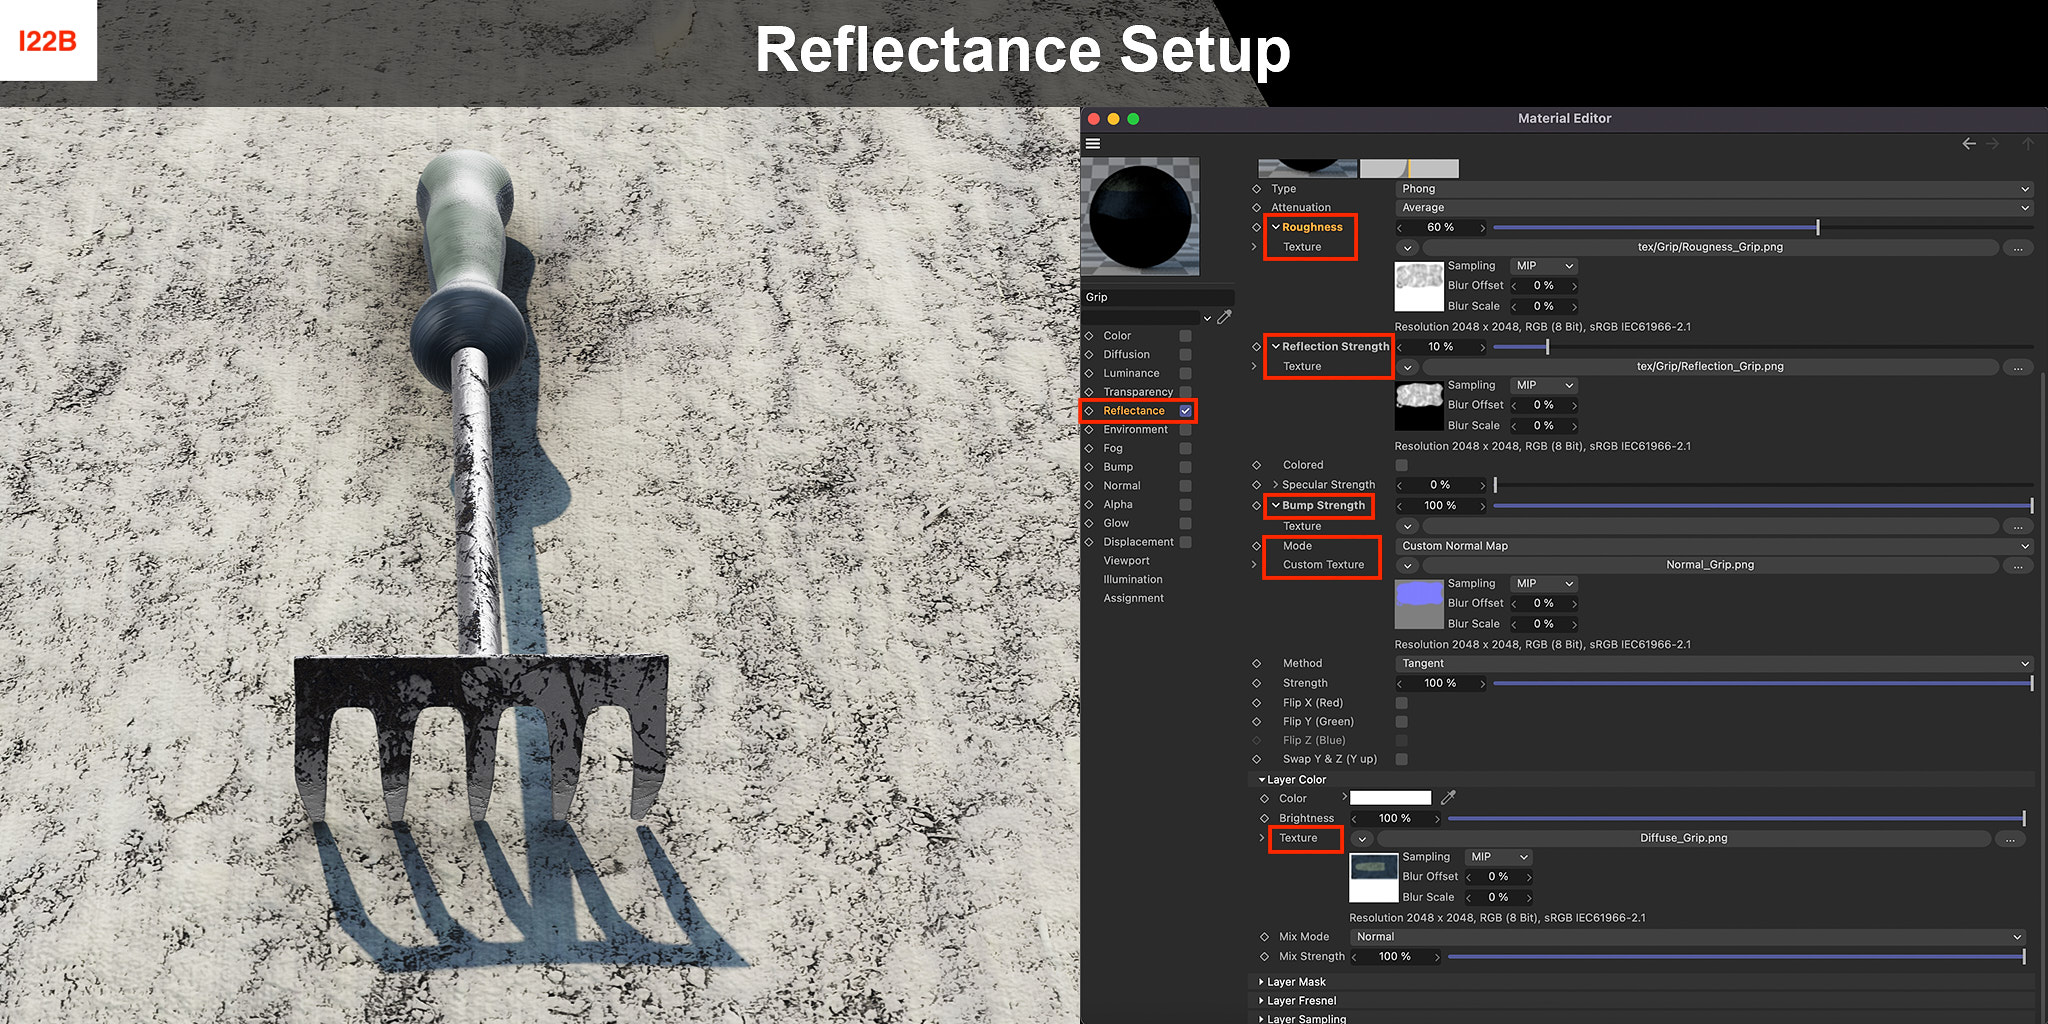
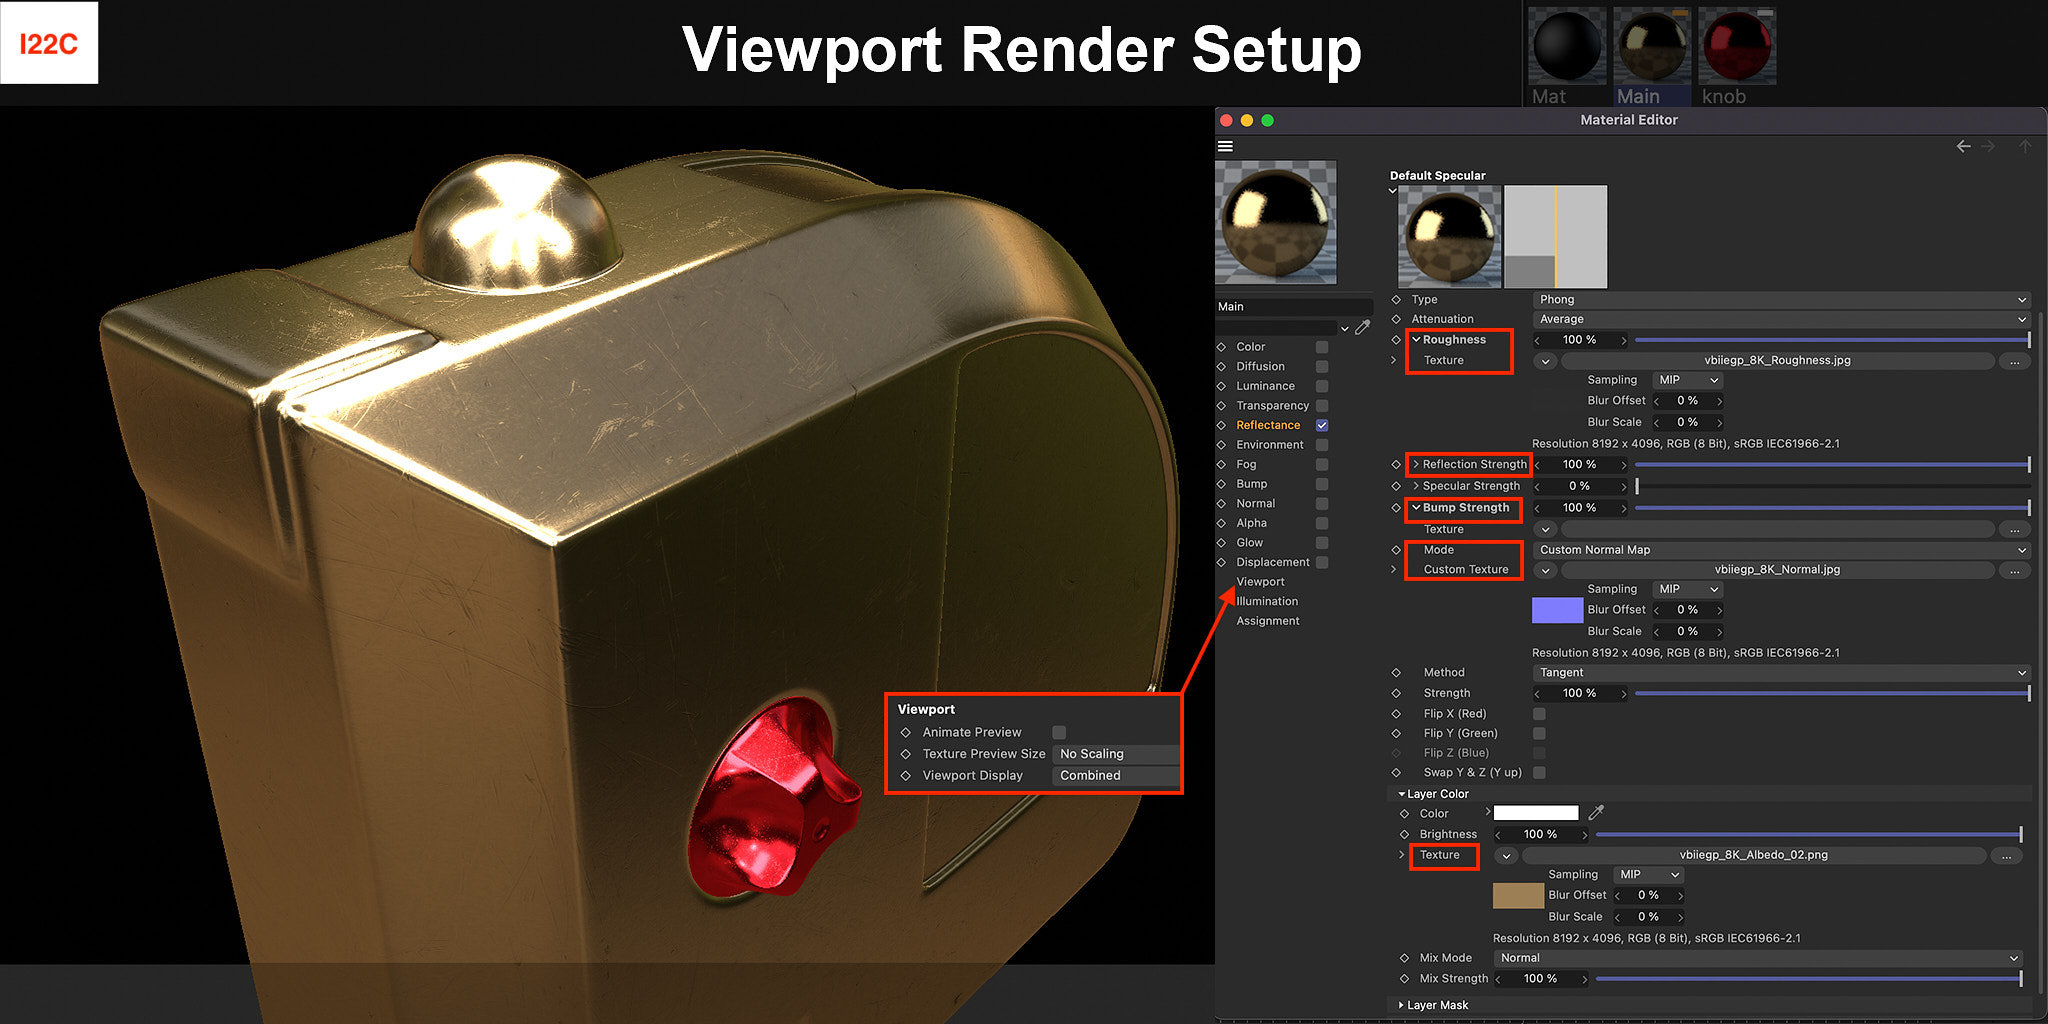
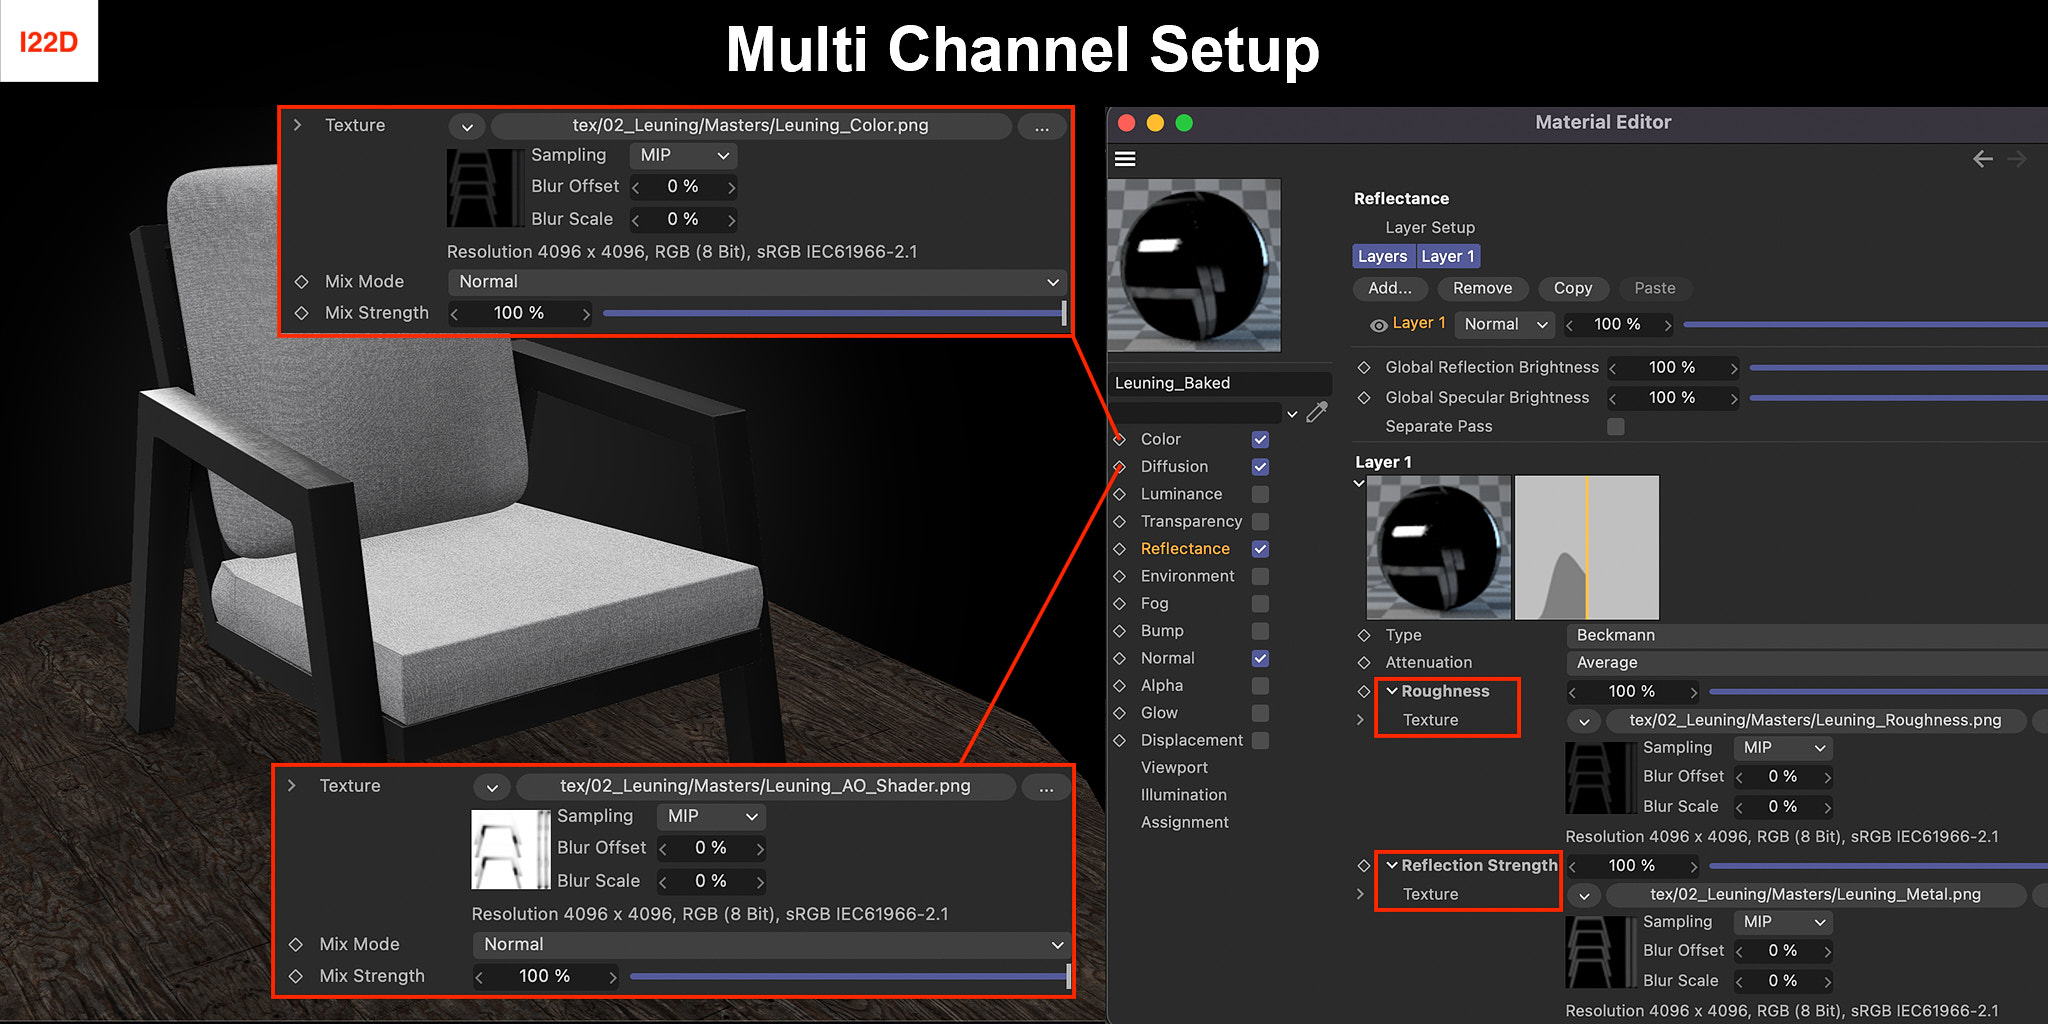
Creating a material for glTF can be accomplished in multiple ways. The choice depends on the production type, speed and the need of using the viewport to preview the result. See for example: Single channel setup(i22A), Multi channel setup(i22B), Reflectance setup(i22C), Viewport render setup(i22D)
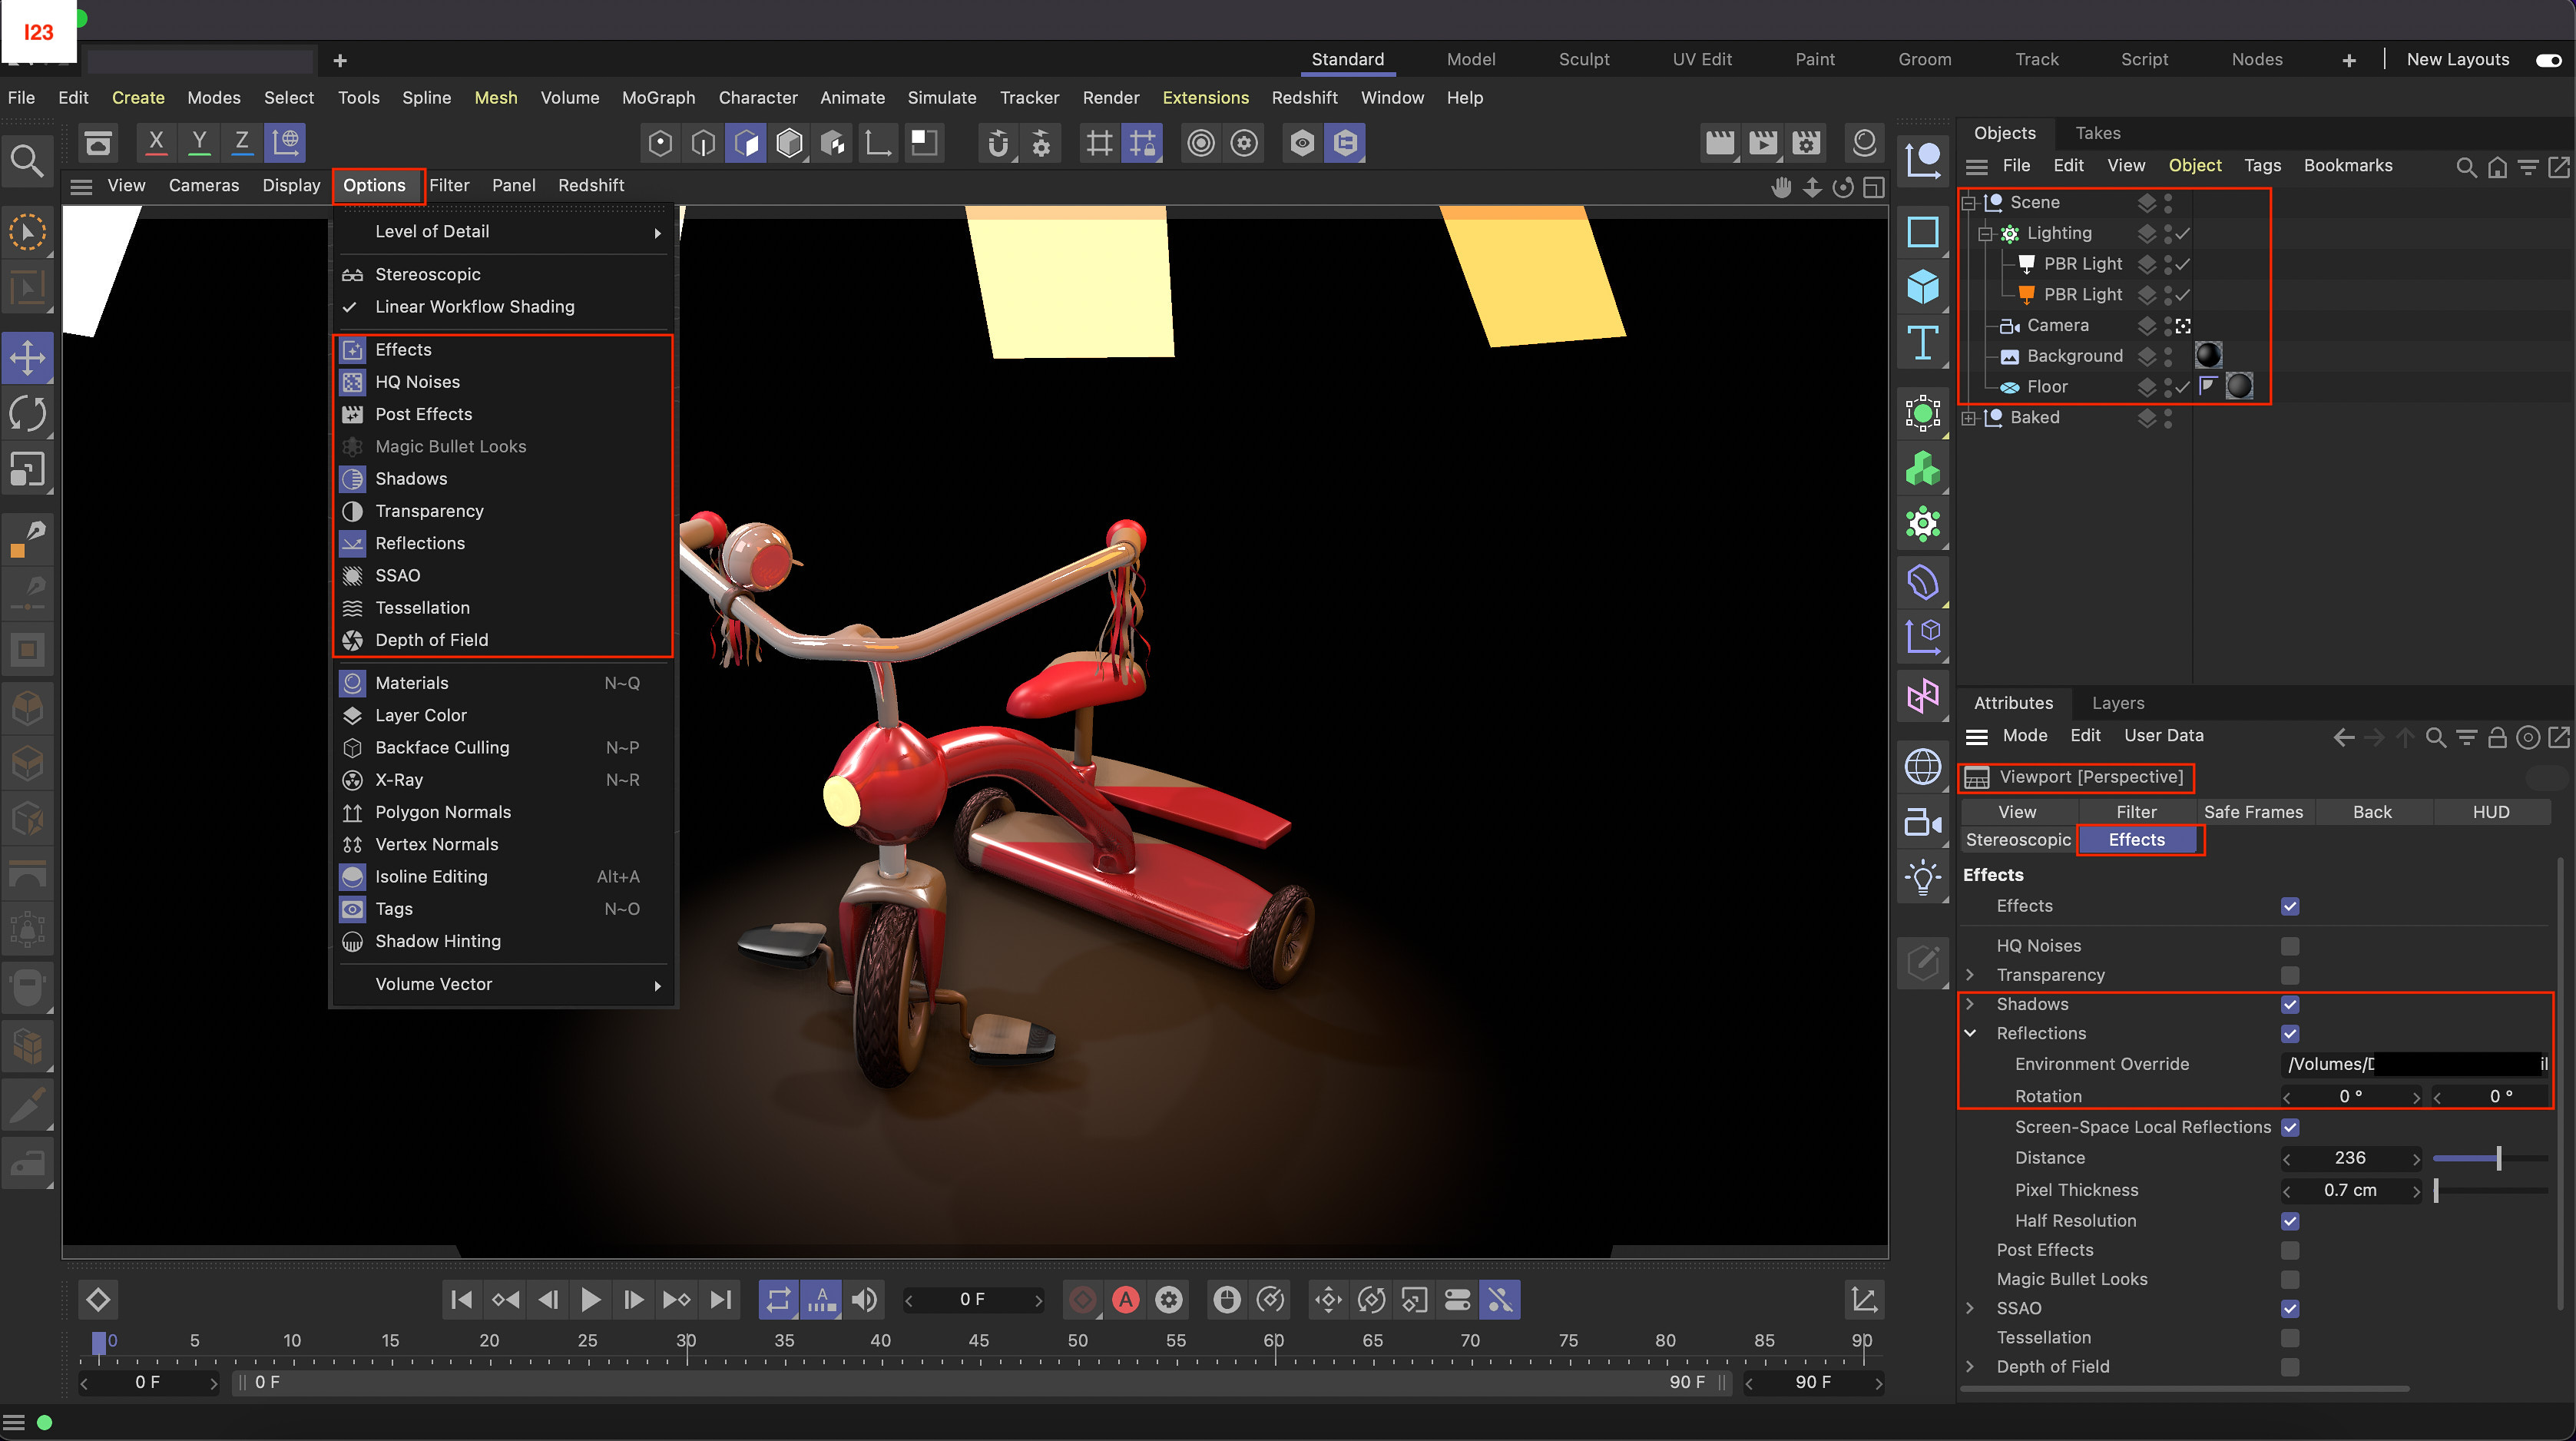
Lighting
The C4D viewport renderer can be used to preview the metallic roughness model in real time. The best practice is to match the C4D viewport with a light setup and environment that’s similar to your glTF renderer. Lights (objects) can’t be exported. (i23)
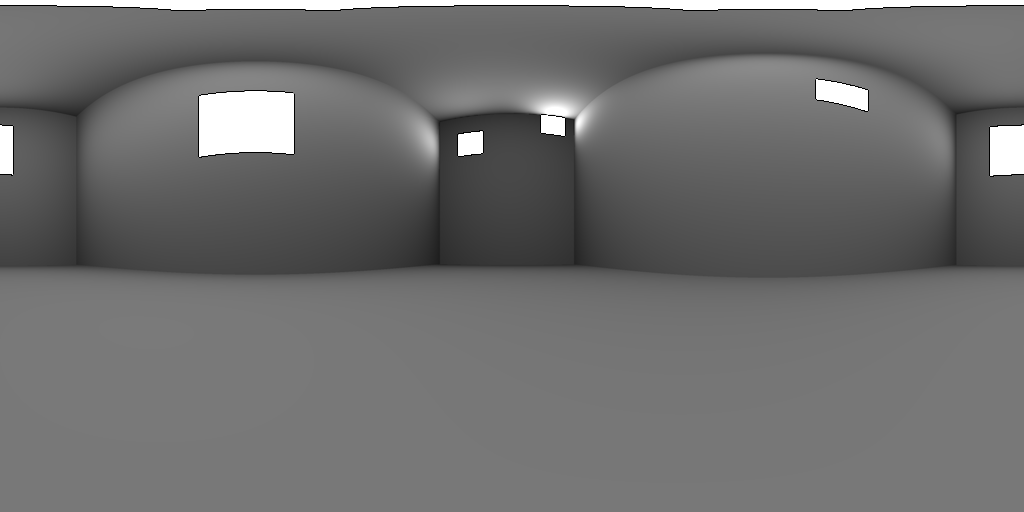
Baked Pixels Sandbox environment
Animations
The C4D Plugin supports TRS (Translation, Rotation, Scale), PLA (point level animation), Skin Animations (Joint TRS) and Pose Morph Targets with weight animations. Exporting multiple animation layers and combining PLA and pose morph targets isn’t supported.(in C4D)
- Time: The project frame rate and min/max time are used to define time (i24)
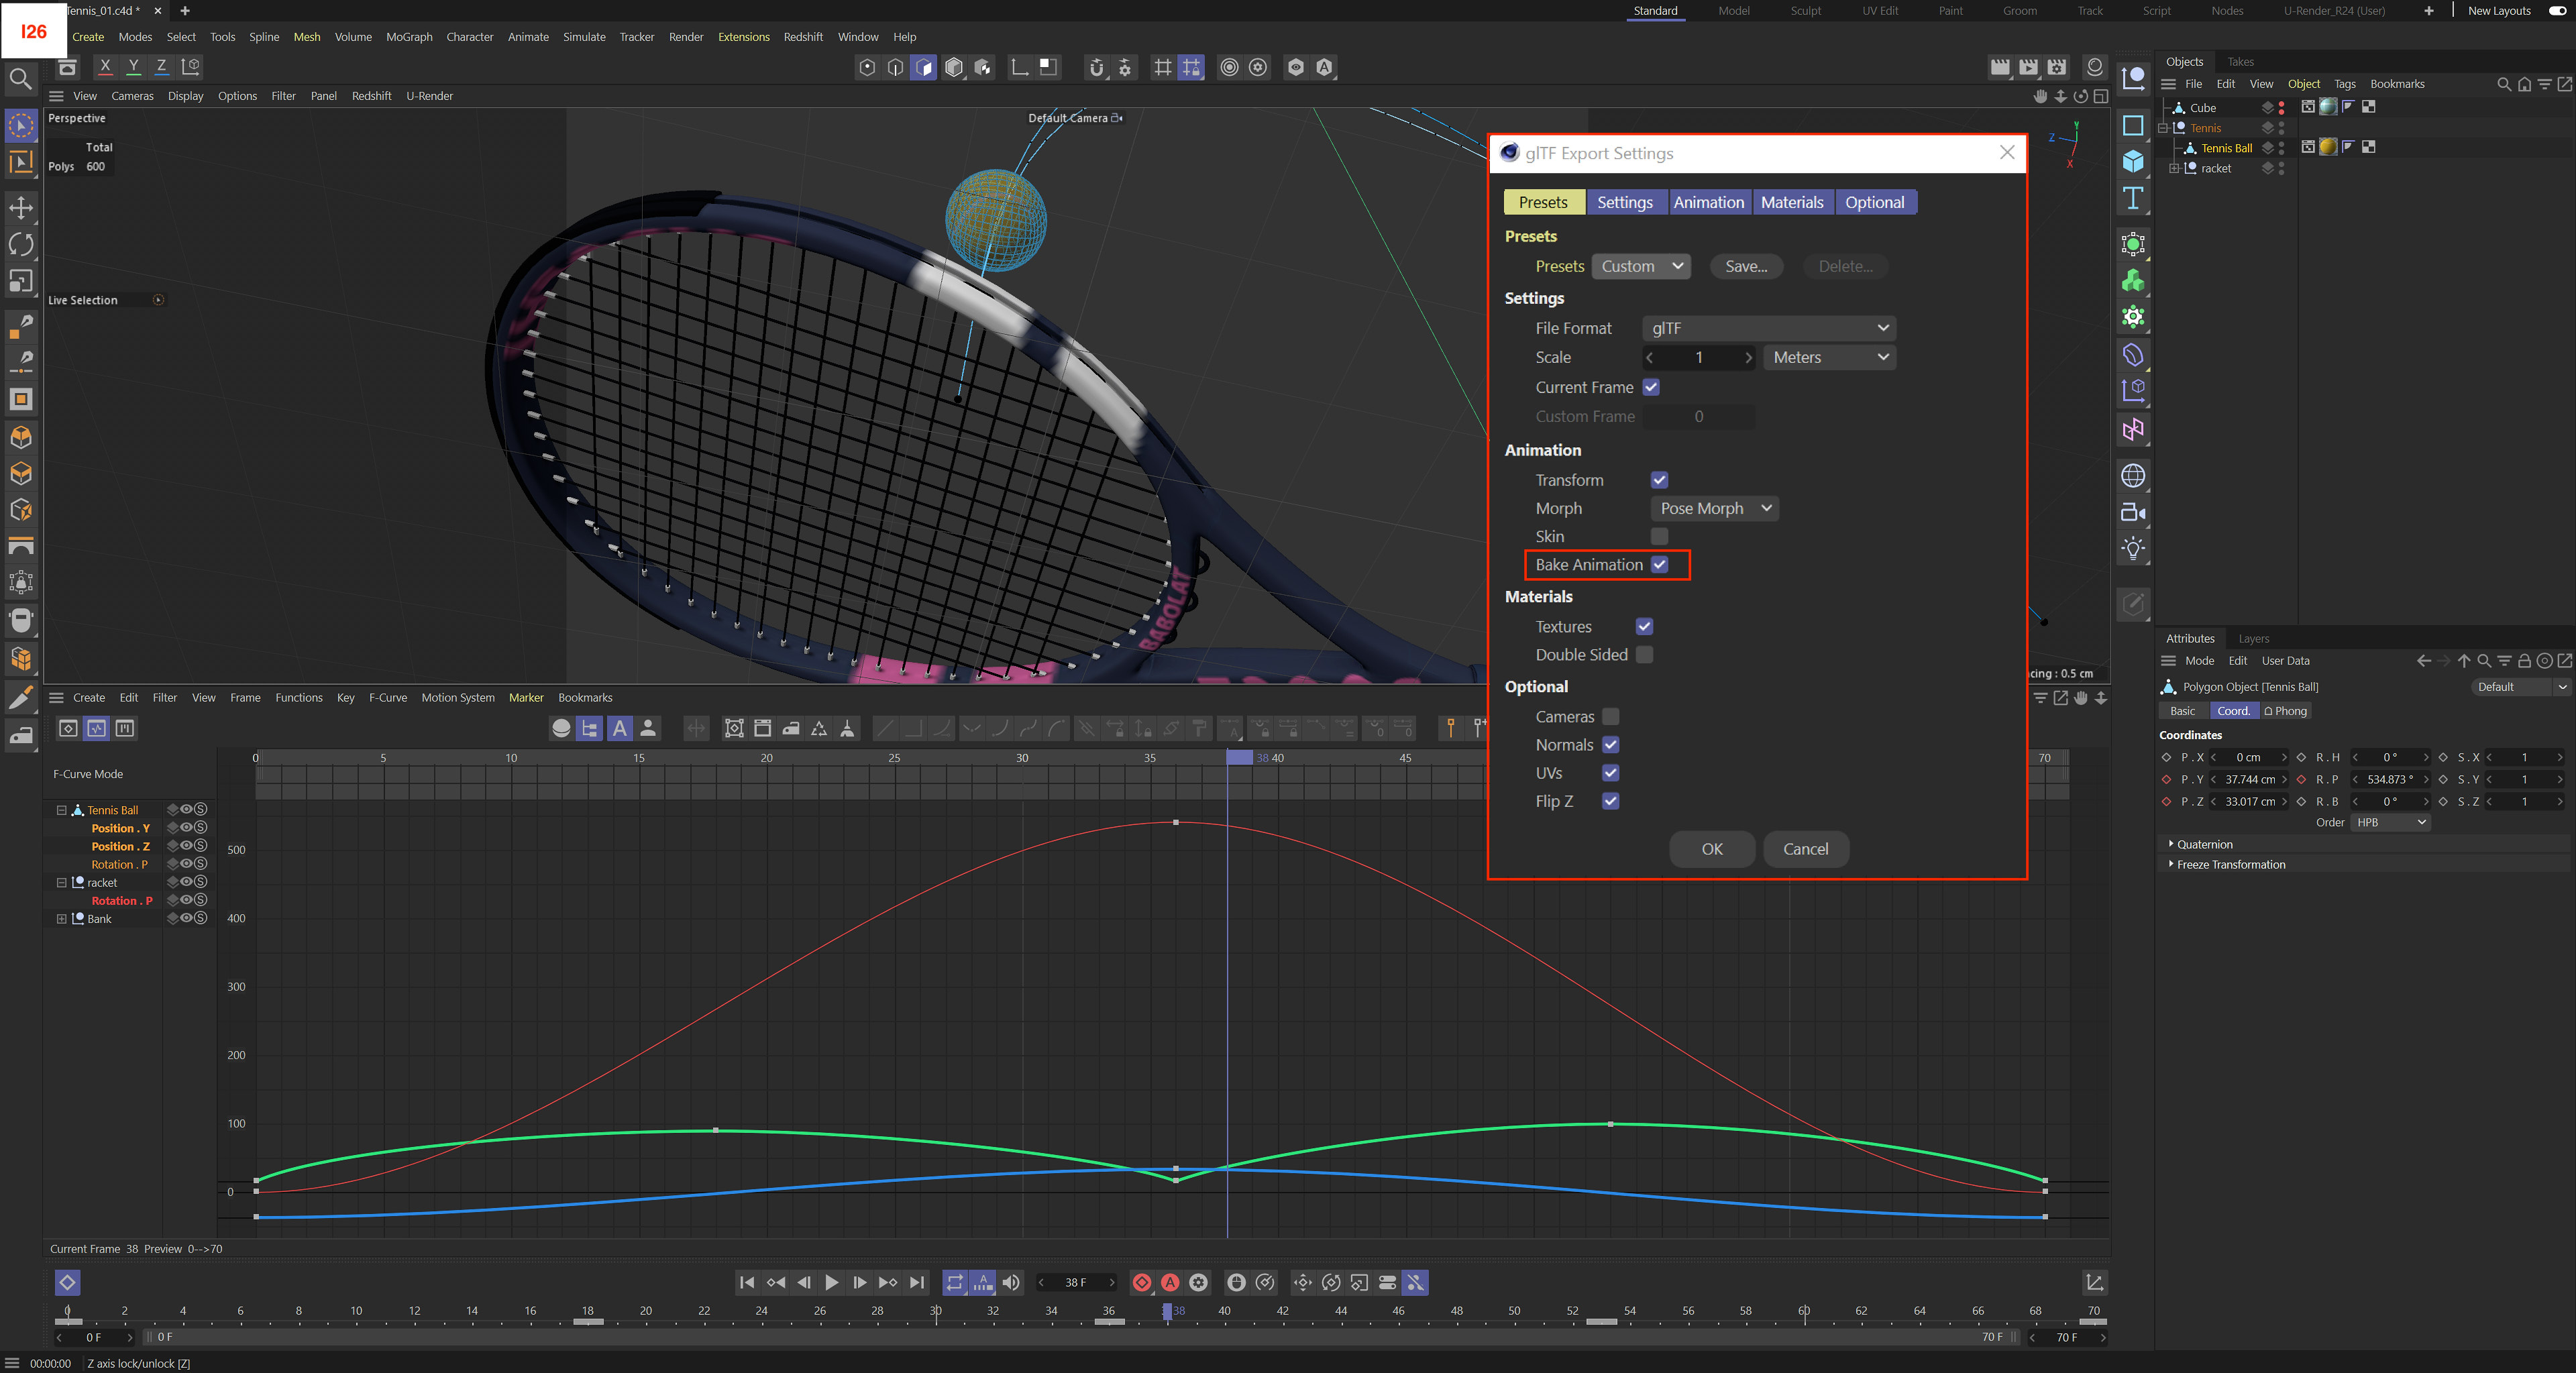
- Keyframe interpolations: Linear, Step and Cubic Spline interpolations are supported. Use the option “bake animation” to convert C4D “Spline Interpolation” into glTF “Cubic Spline” interpolation on export. Animation video
- TRS: All objects can have TRS animation tracks.(i26)
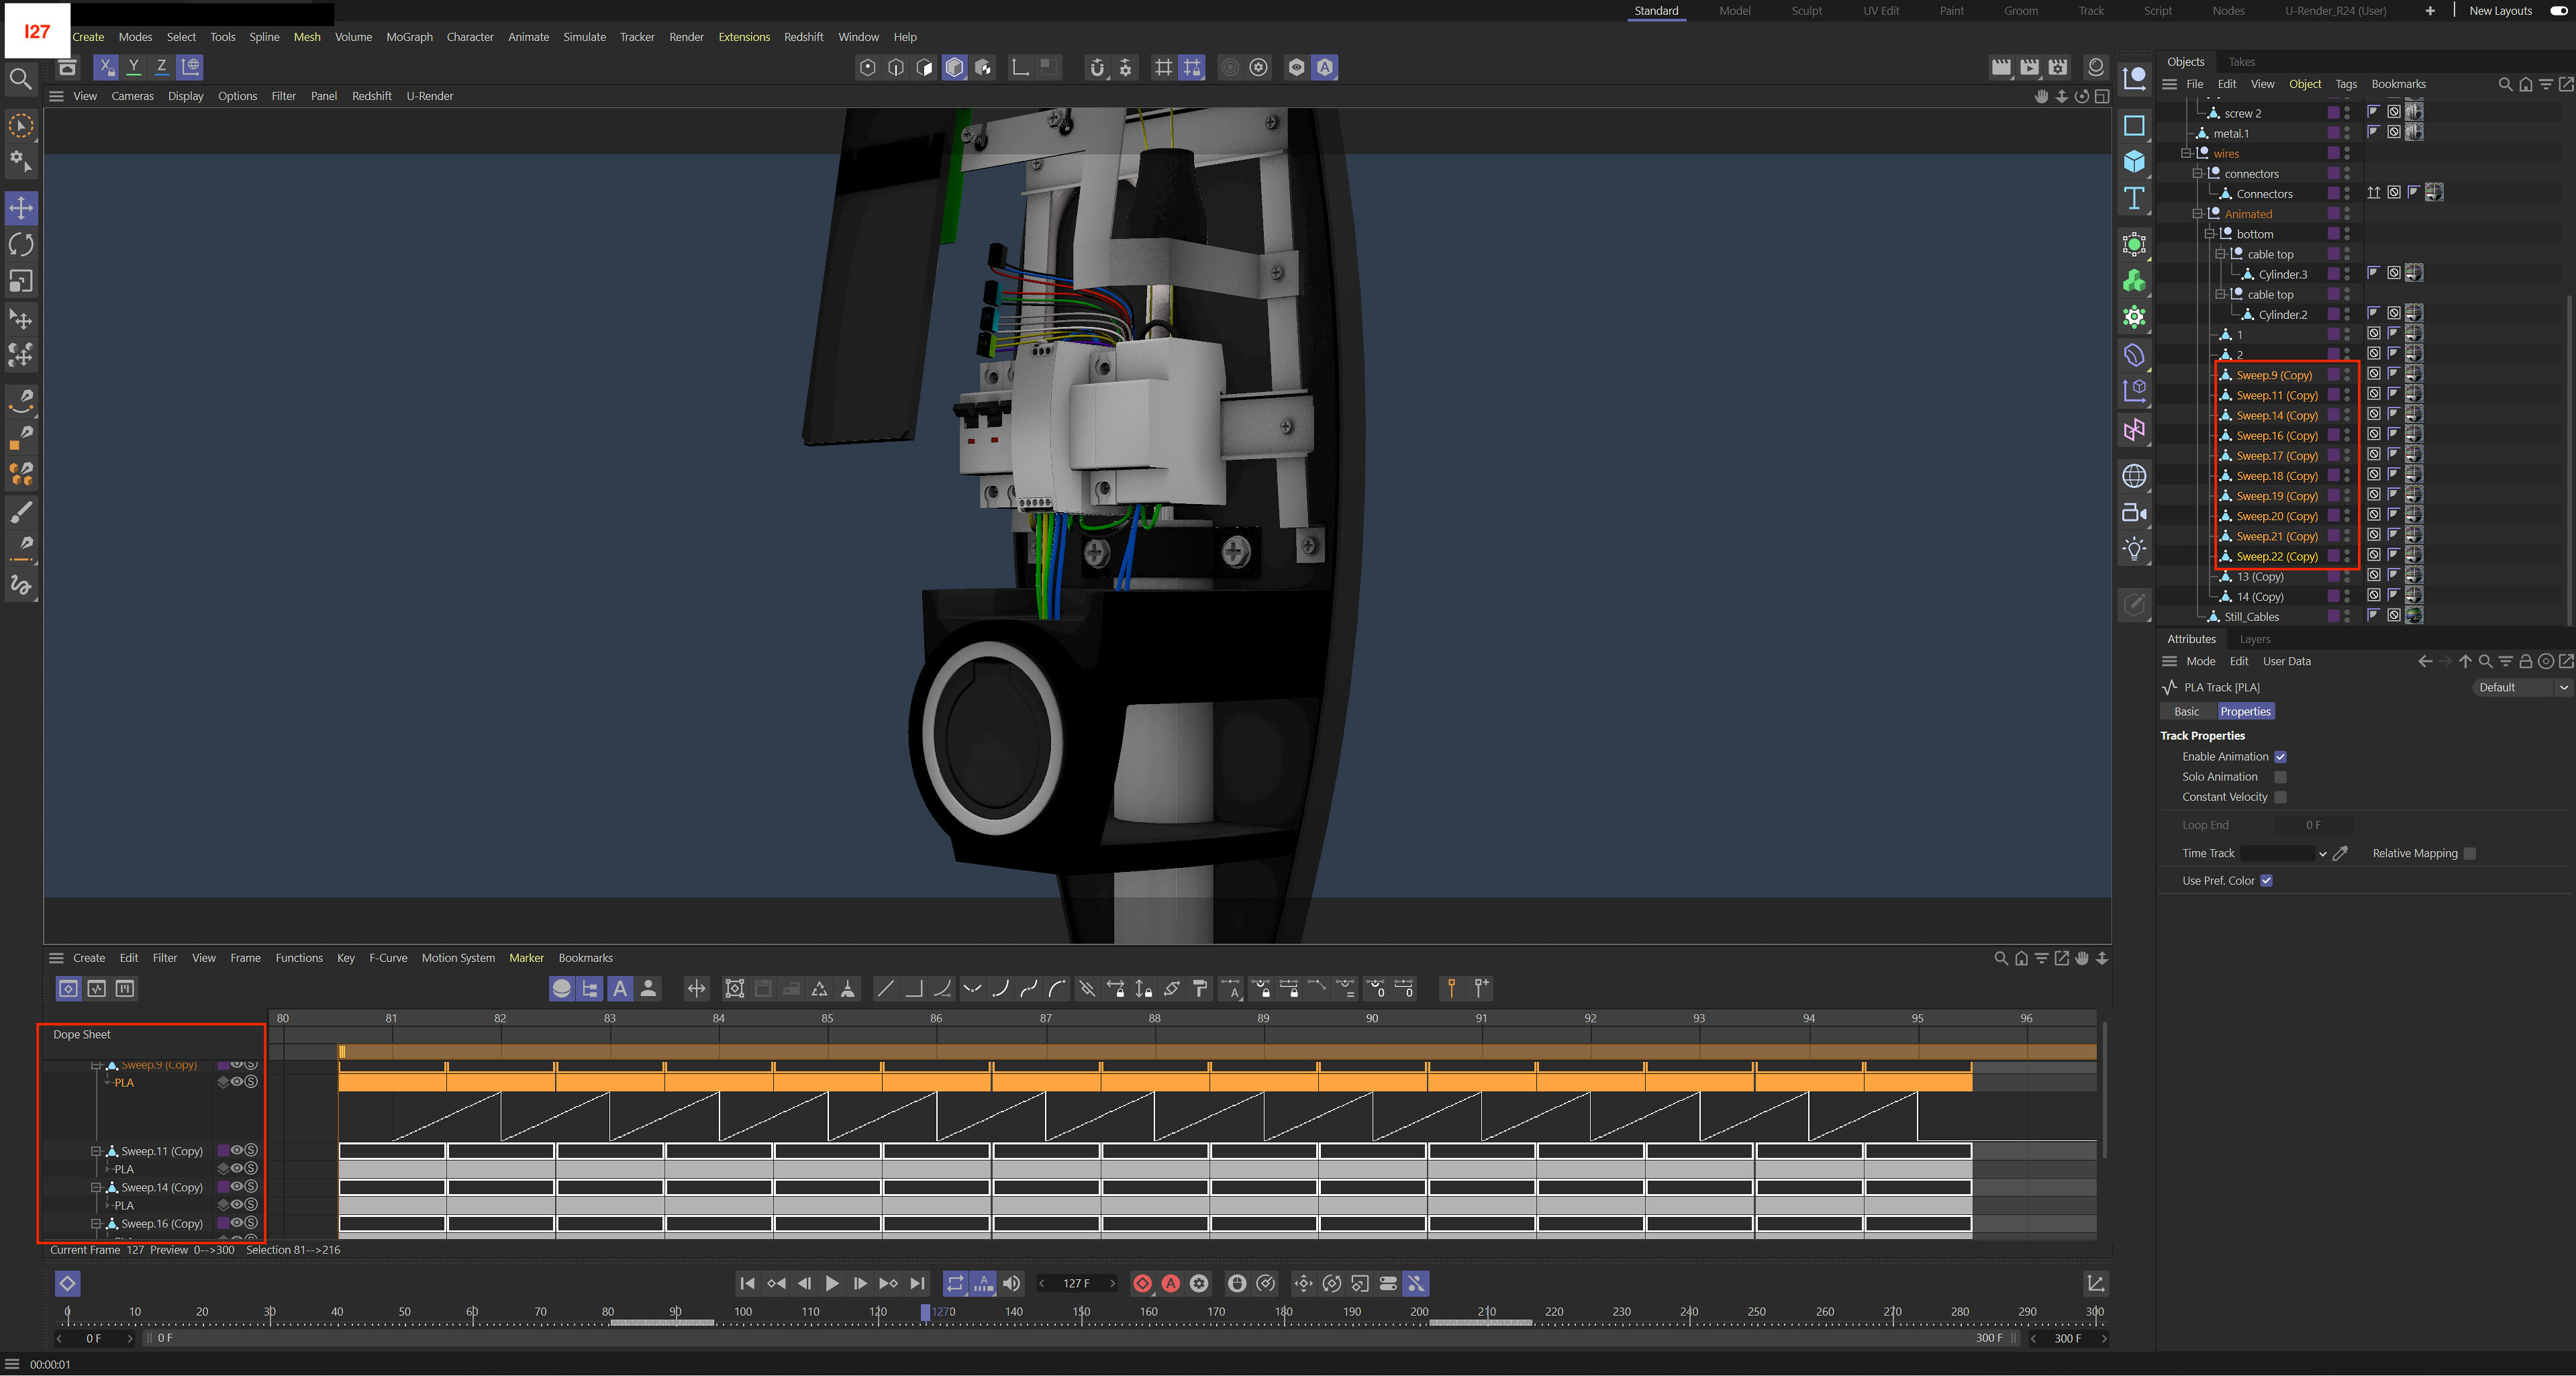
- PLA: Polygon objects can have 1 PLA animation track (i27)
- Pose Morh: Polygon objects can have a pose morph tag with mixing mode “points”. Multiple targets (poses) can be defined including internal reference targets. The individual weights (strengths) can be animated with the sliders in animation mode. The main strength slider has no effect. Targets can also be used for interactive purposes in the renderer.(i28)
- Joint: Hierarchical structures of joints can be animated through TRS animation tracks and connected to skins.(i29)
- Skin: Skin animations can be driven by animated TRS tracks from joints. The amount of joints that can influence a single vertex is limited to 4 (similar to COLLADA).


Expressions, Simulations and Generators
Animations created with expressions, dynamics, MoGraph or Generators should be baked to TRS and/or PLA animation tracks. For a simple scene you may try the “Bake Animation” option within the glTF export settings. However baking manually gives more control over the actual endresult. (i30) (Baked Dynamics animatie)
Note 1: USD(Z) doesn’t support PLA at this time.
The influence of animation tracks on file size
Think strategically about animation tracks when working with GLTF. The file size of your export will incrementally grow when more information is stored in animation tracks.(i31)
Exporting the scene
The scene can be exported into two available file extensions .gltf (JSON/ASCII) or .glb (binary). We advise to use .glb rather than .gltf.


